
Learn Freelancing the easy way
Level 1 freelancing
You do not need to spend any money from your pocket to earn - payment proofs are shown near the end of the lesson. If you work outside of your home country, you may or may not need an "online work permit" based on foreign country rules
Freelancing is simply the ability to earn from your home at your own pace, based on specific skills that you possess or no professional skills at all. Freelancing is for everyone - someone with zero skills to a high grade professional. Unlike corporate office and regular jobs, freelancing does not force you to work at specific times a day. The guide below shows you how can you start your freelancing journey at zero cost
First in order to withdraw or cash out your earnings you need a wallet. Make sure you are above 18 years old and have a national ID card or passport for a simple verification. To get your wallet, click
Take a look at the example below of how to withdraw from wallet to Bkash, Nagad and other exchanges
Starting your journey
To start your freelancing journey, you must create an account to a freelancing website. Sites like Upwork and Fiverr often require professionals, but we will start with simple freelancing that almost anyone can do in their free time. Follow the guidelines step by step to become a member of a freelancing website
1. Create an account
2. You need to verify your email wherever you create an account. This is a common procedure everyone is expected to follow. Also remember that when signing up they may ask you for a "Nickname" also known as "Username". Many people get stuck here. Usernames should be like these, for example:
alex.smith
alex590
Alex140
smith90
Not like this: Alex Smith or Alex
You can choose a username depending on your own choice, for example: Progamer9010
3. Log in to your account:
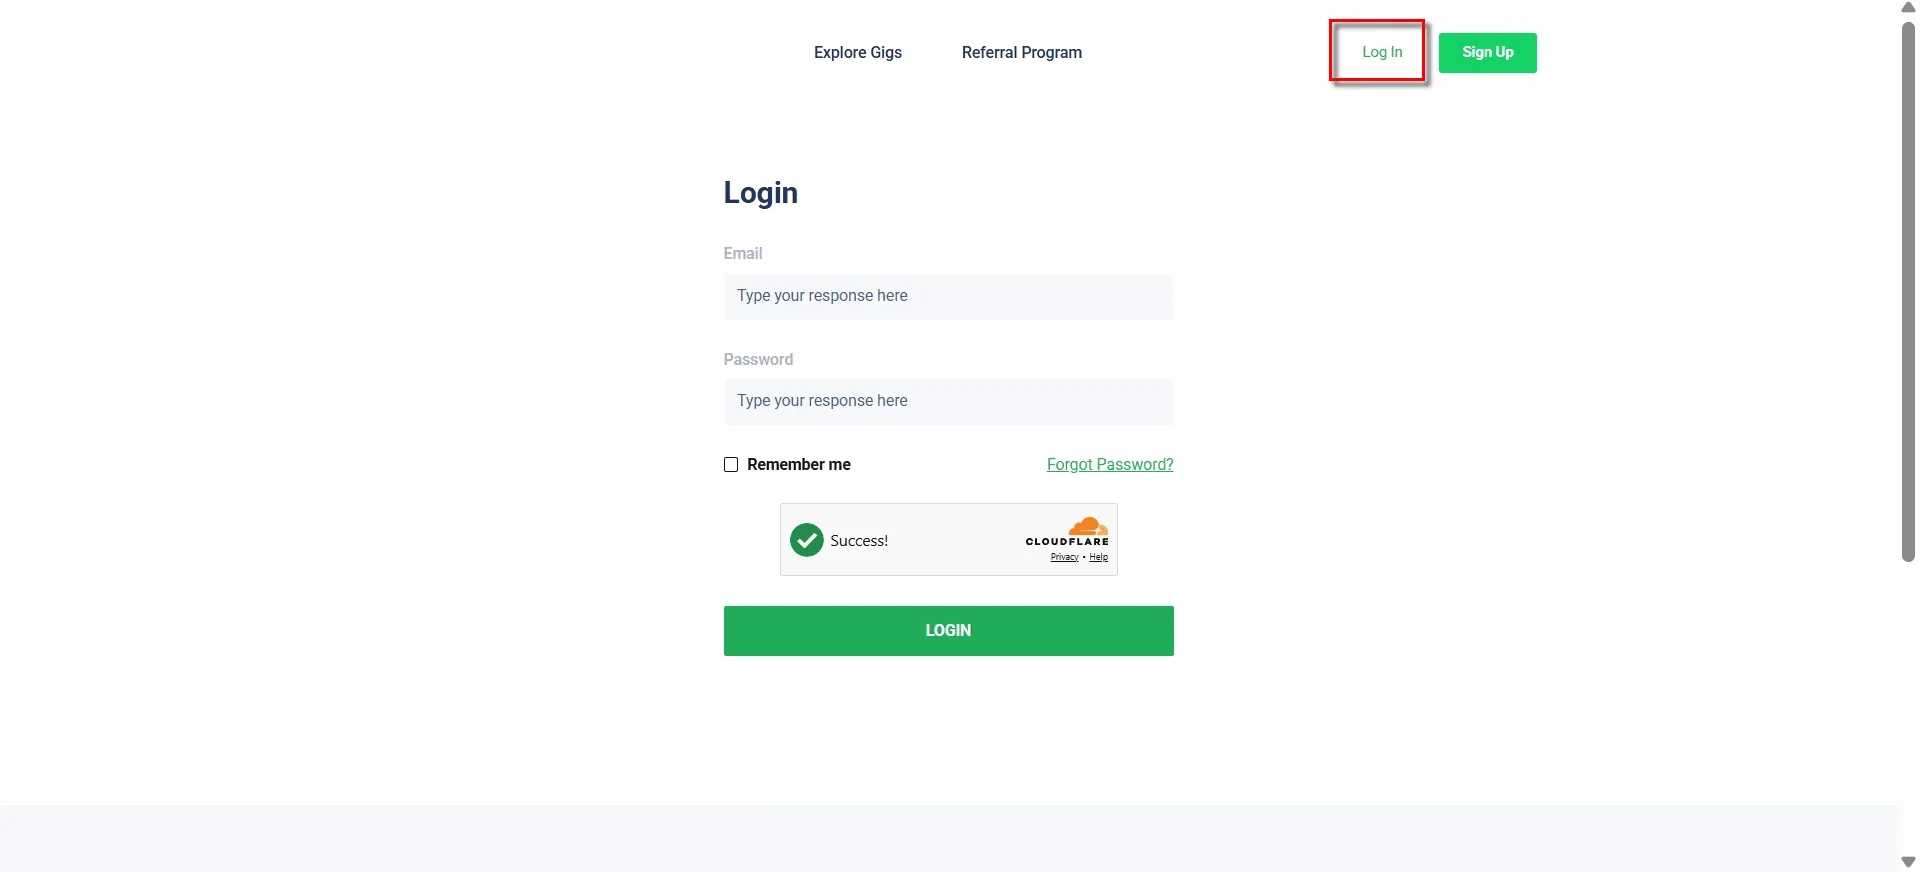
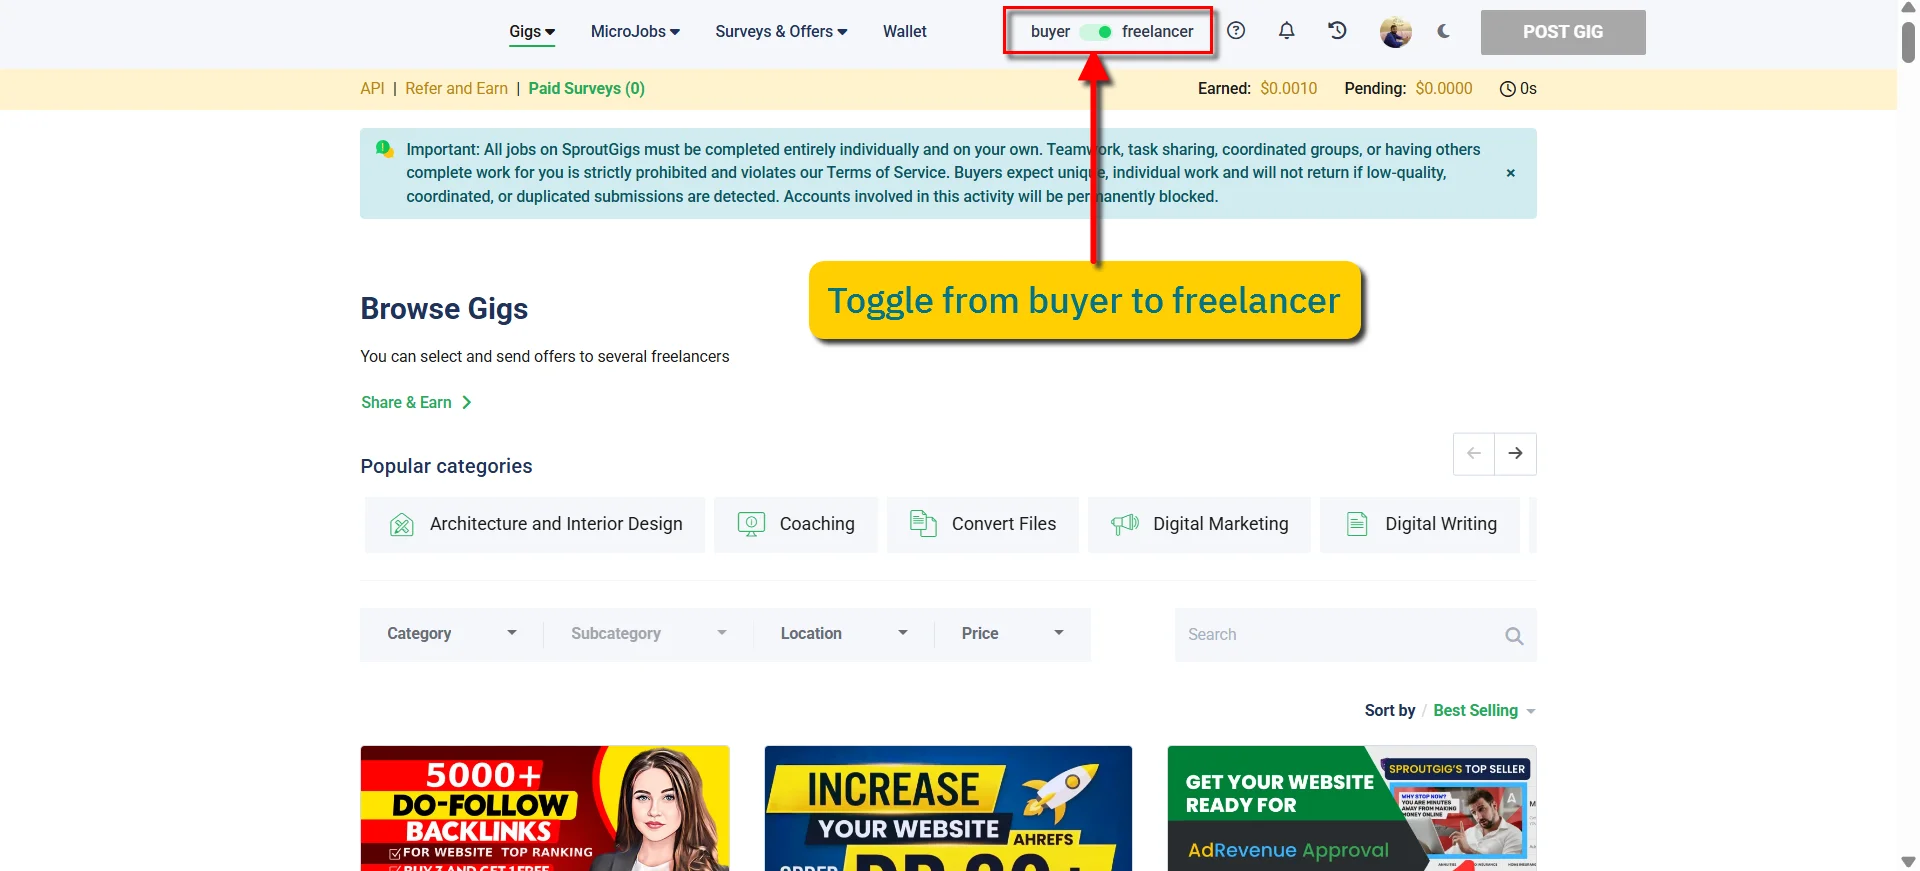
4. Toggle to "freelancer" mode
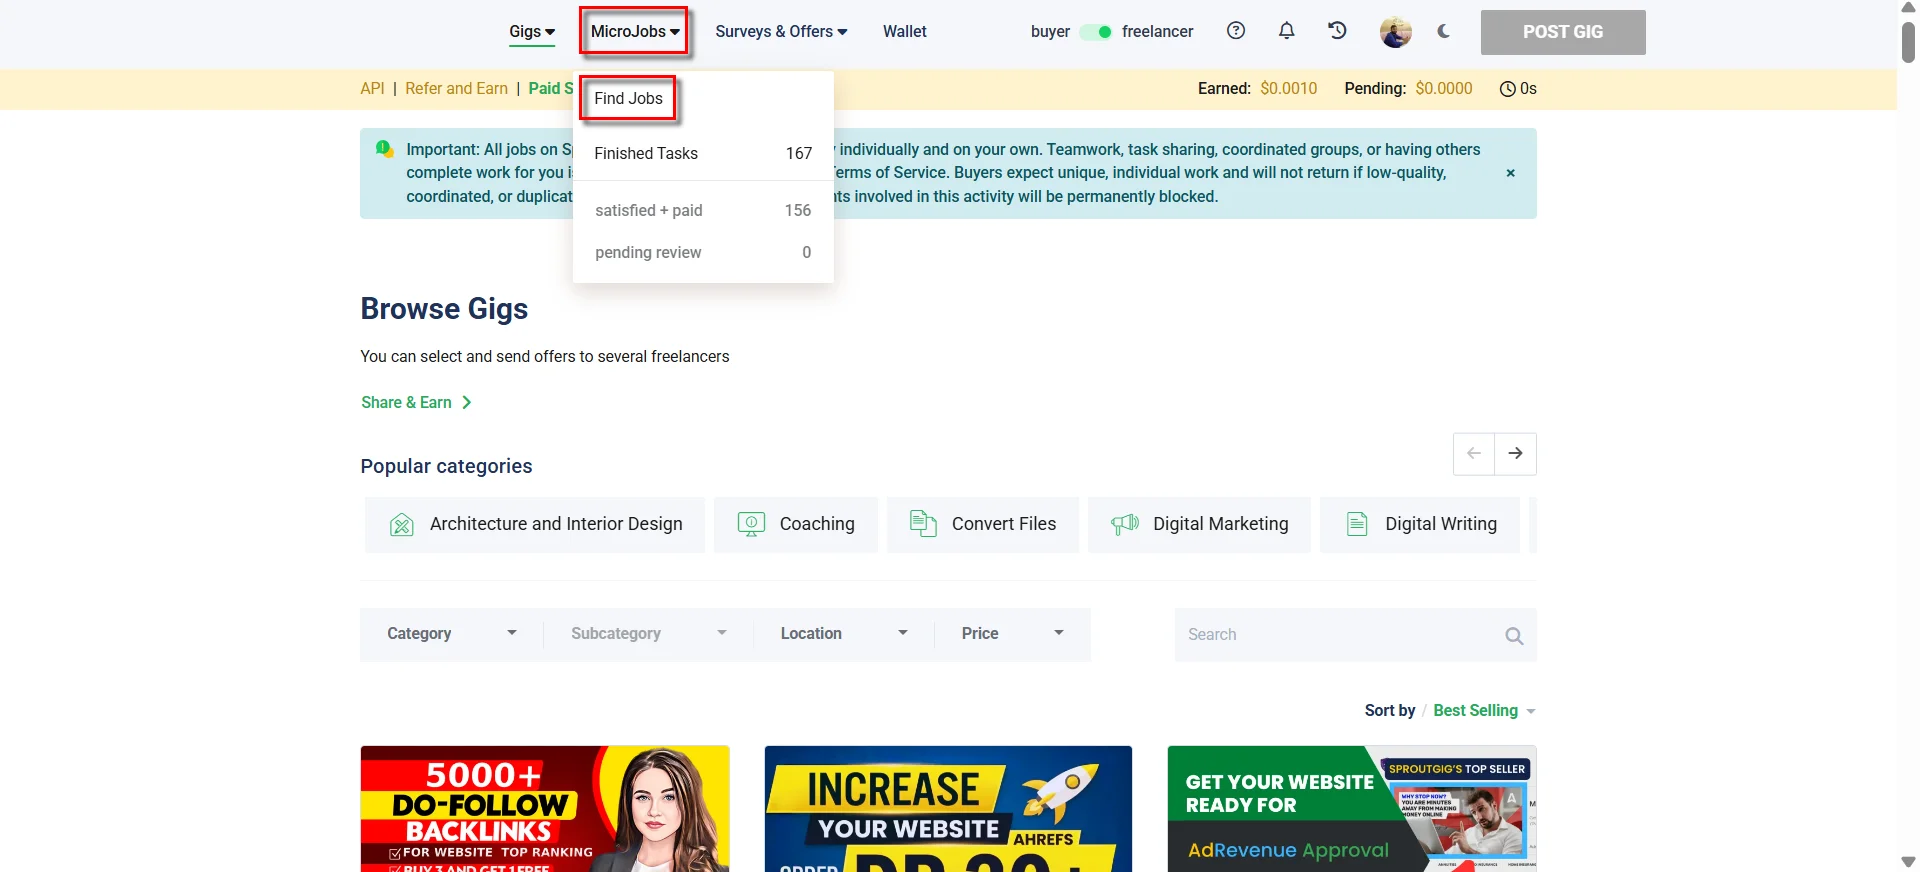
5. Click on "Microjobs" and under it, click "Find Jobs"
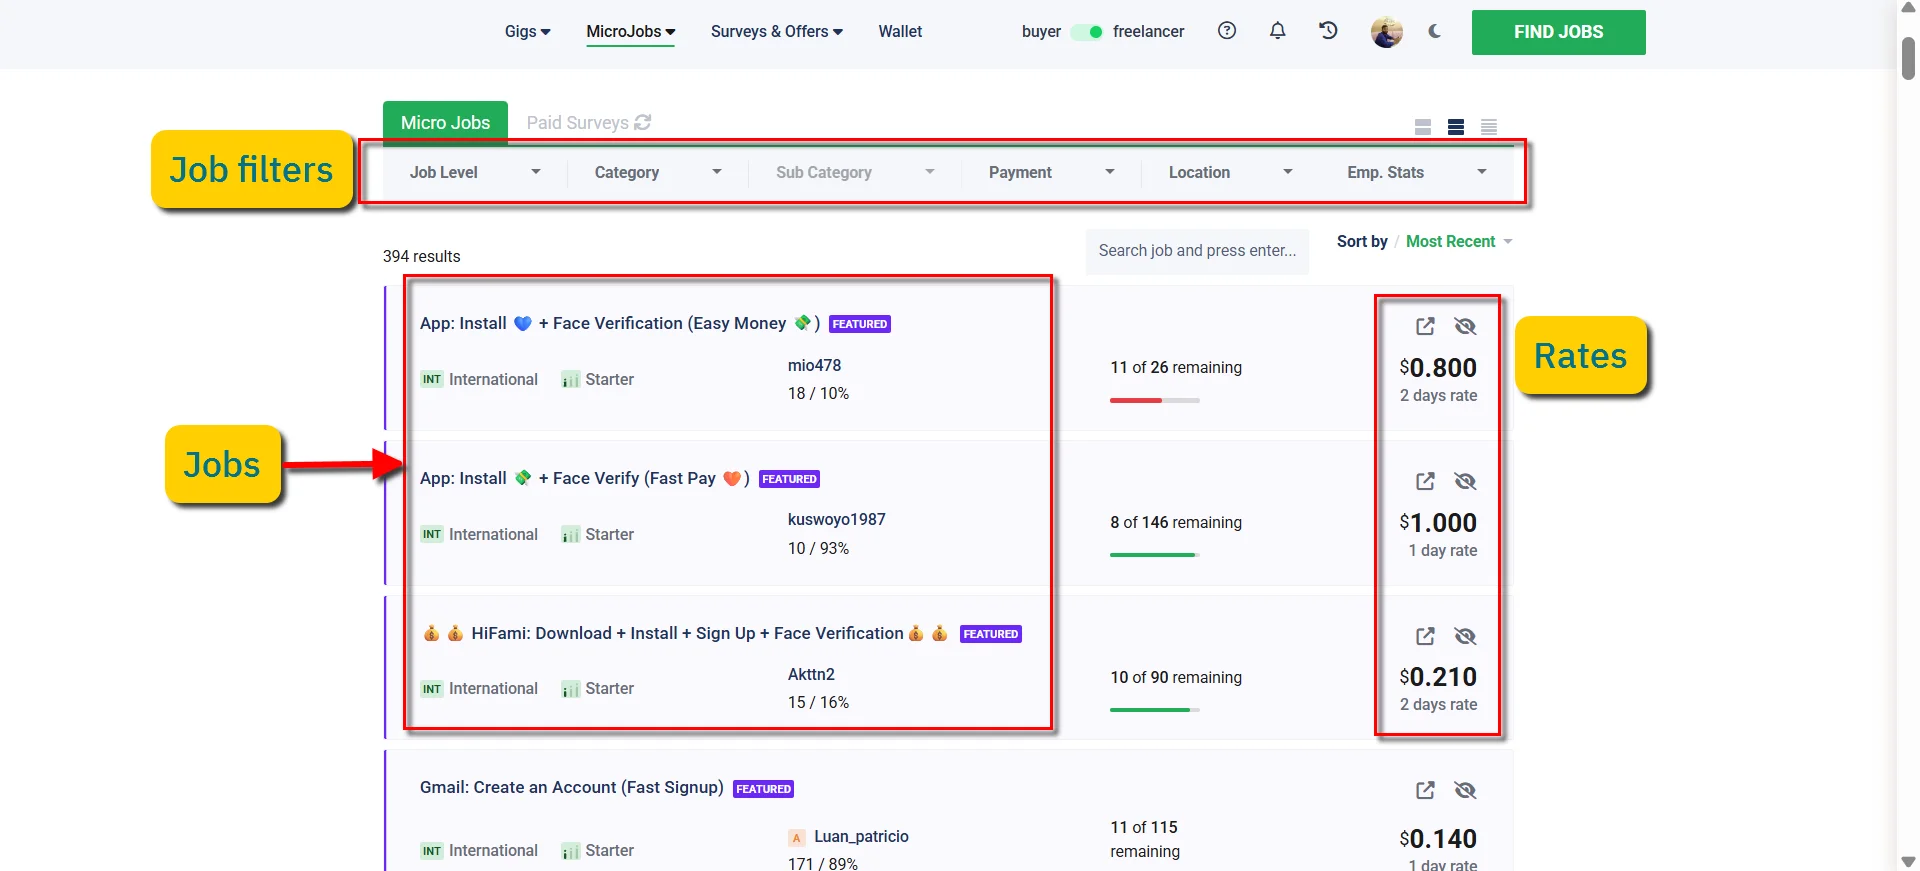
6. You will see a list of tasks from advertisers. Your job as a freelancer is to complete these tasks. Each task will have a limited quota, a specific rate and title. At the beginning you will only be given easy tasks - the hard ones will be locked. Once you complete the easy ones the hard ones will unlock
7. Once you click on a job title it will open with it's description and proof requirements. You can hold the job for 15 minutes to secure your quota - it will charge a small fee but it is optional
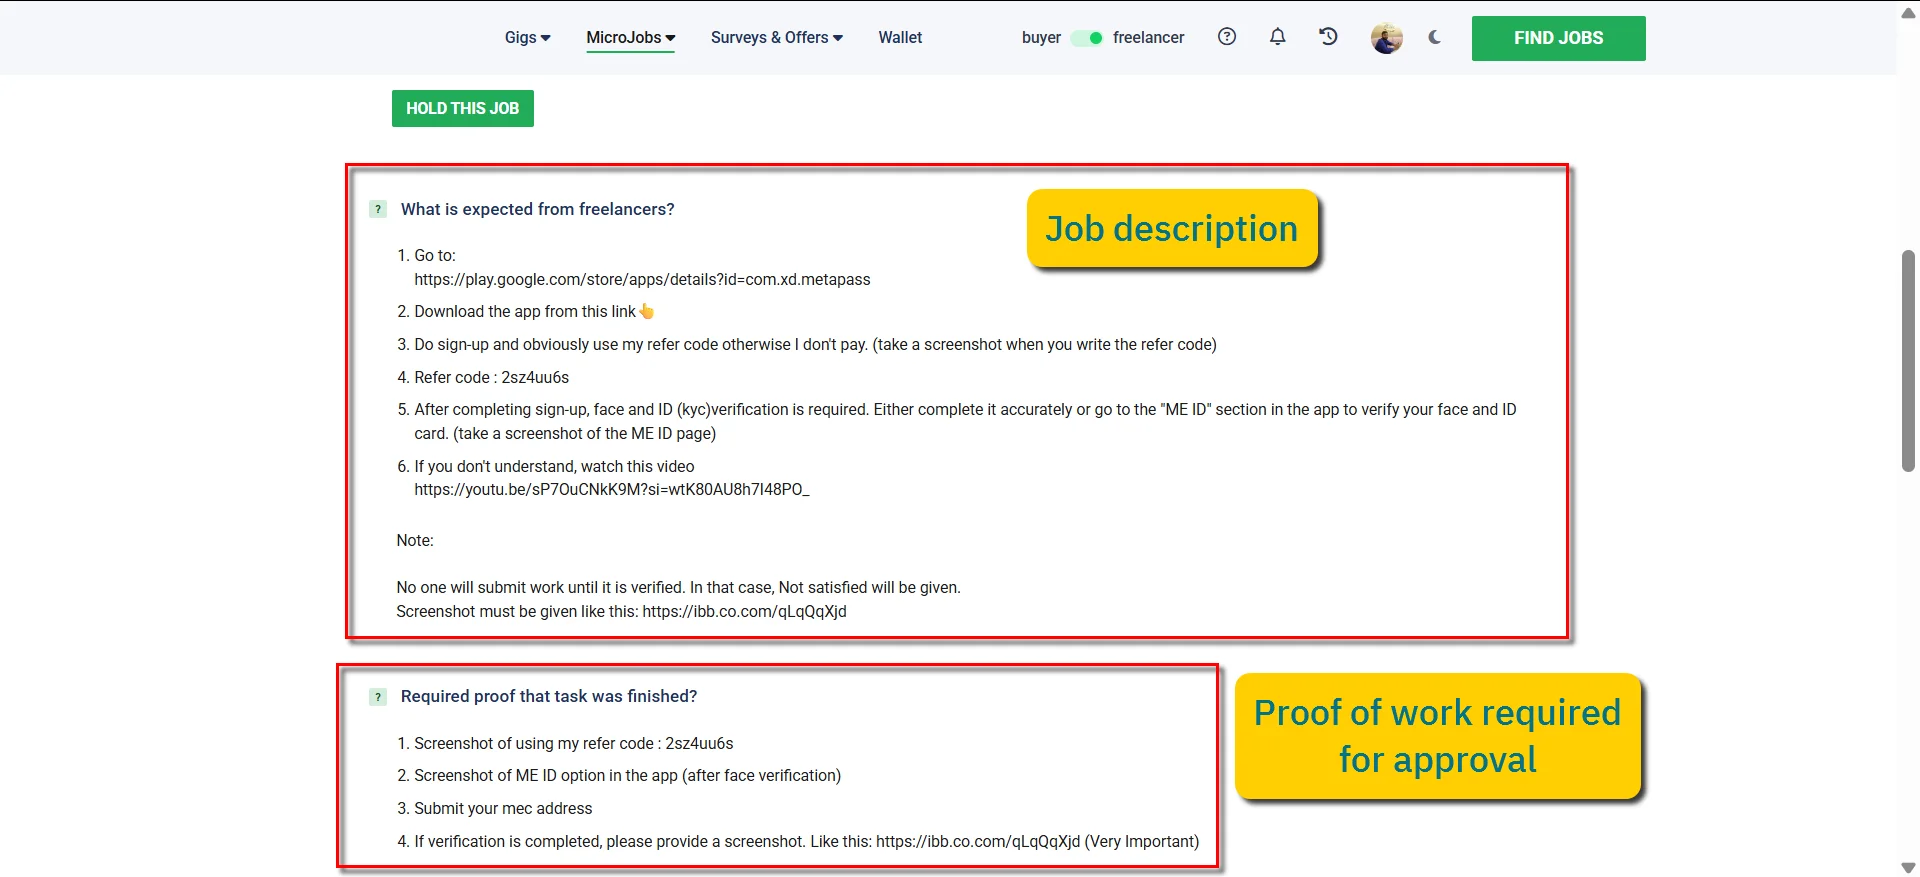
8. Once you have done the job, submit your proof files as instructed by the advertiser and click on "SUBMIT PROOFS" button. Your work will be pending for approval until the advertiser marks them. Once approved, the balance will be added to your account
If you do not understand anything yet, keep reading it will make more sense as you see examples below
Example
1. Select a job. Here for example I took a YouTube job
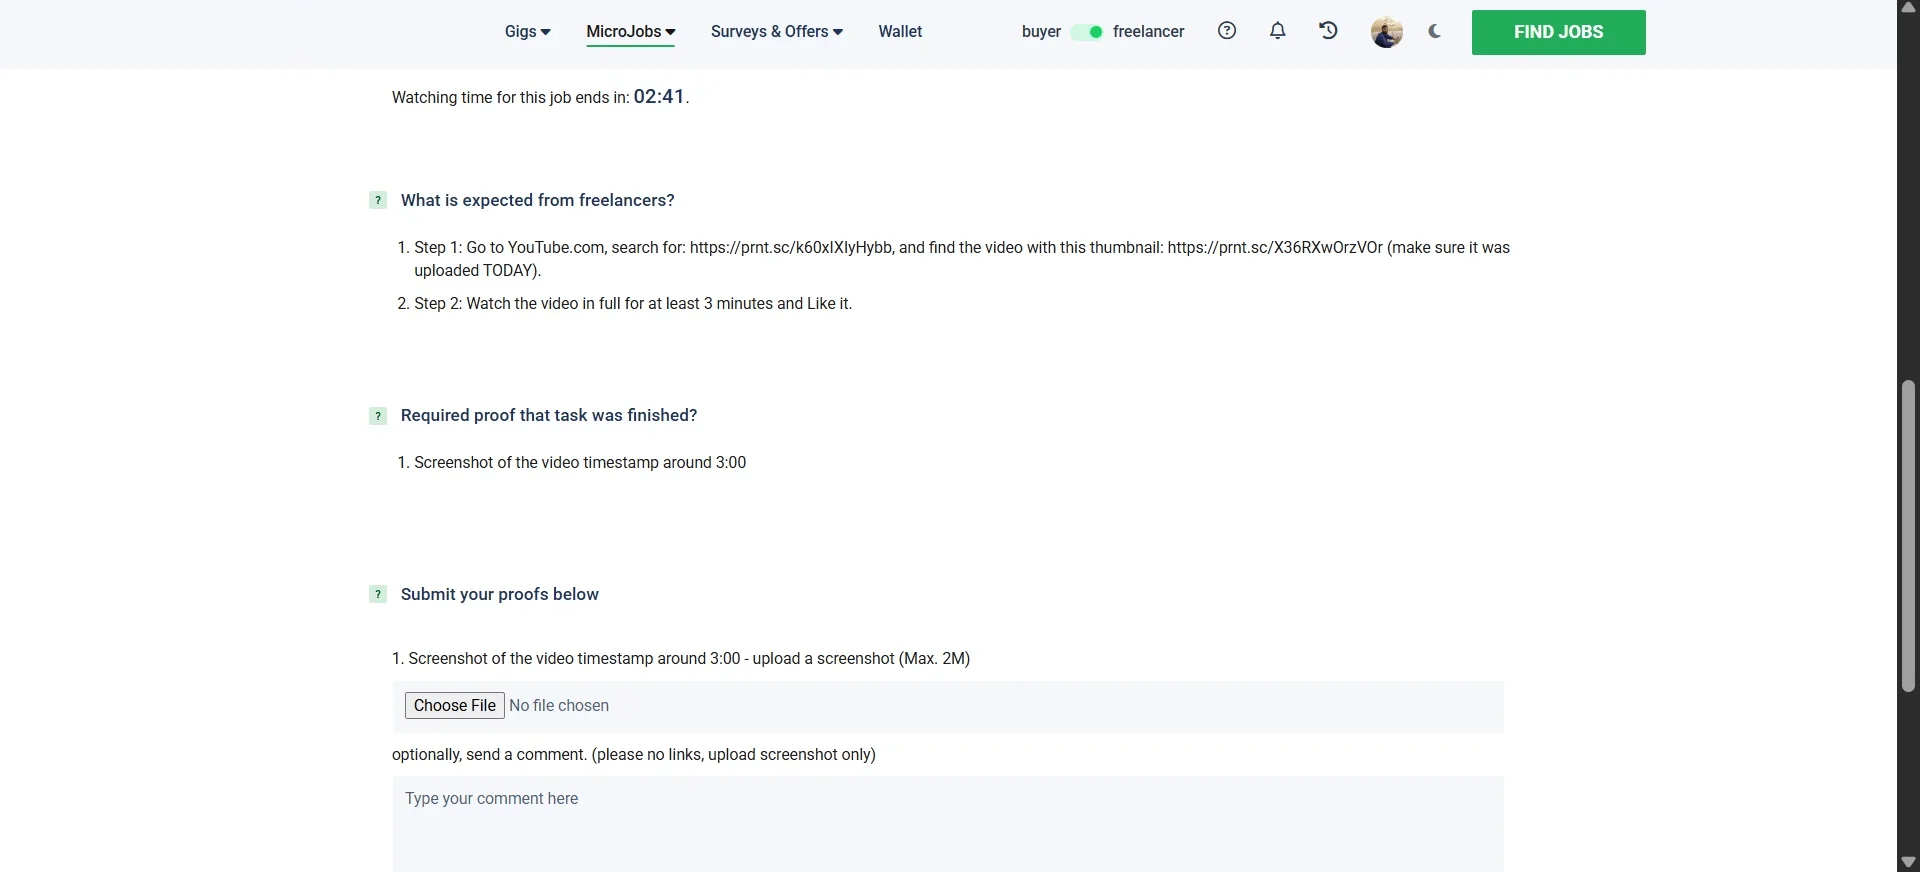
2. Open the given link (https://prnt.sc/k60xIXIyHybb) mentioned in the instruction in a new browser tab to find out which video you need to watch
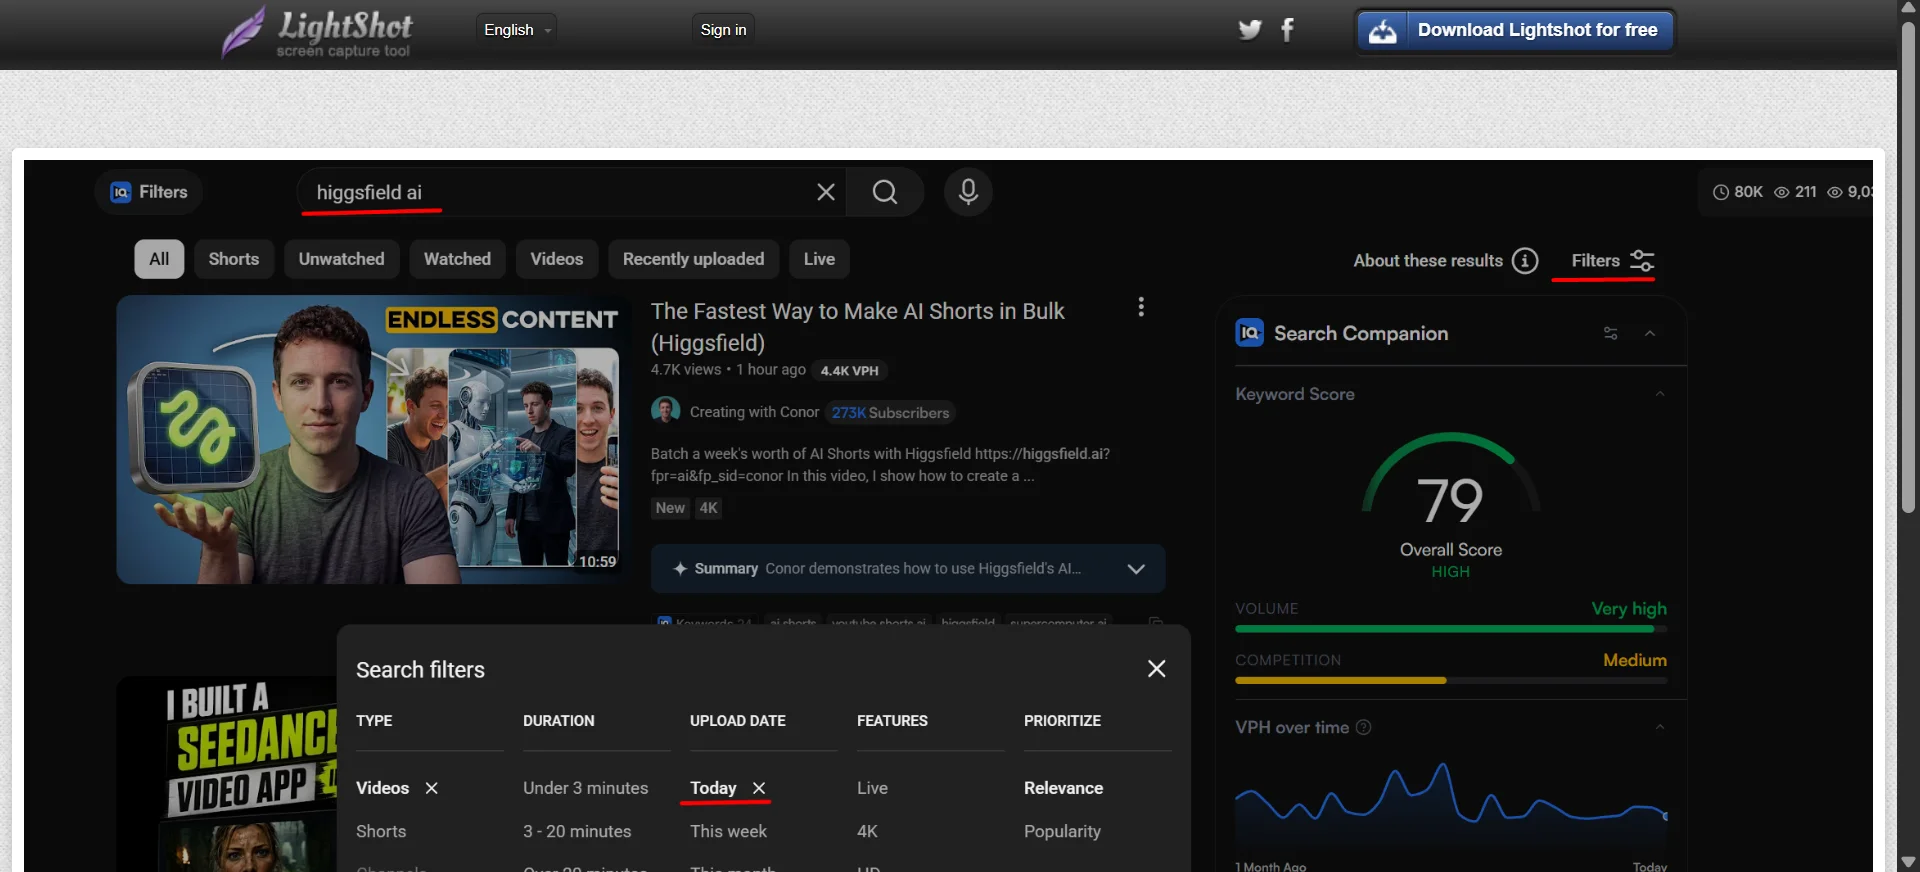
3. Type the keywords instructed into the search box and find the video that matches the thumbnail from (https://prnt.sc/k60xIXIyHybb)
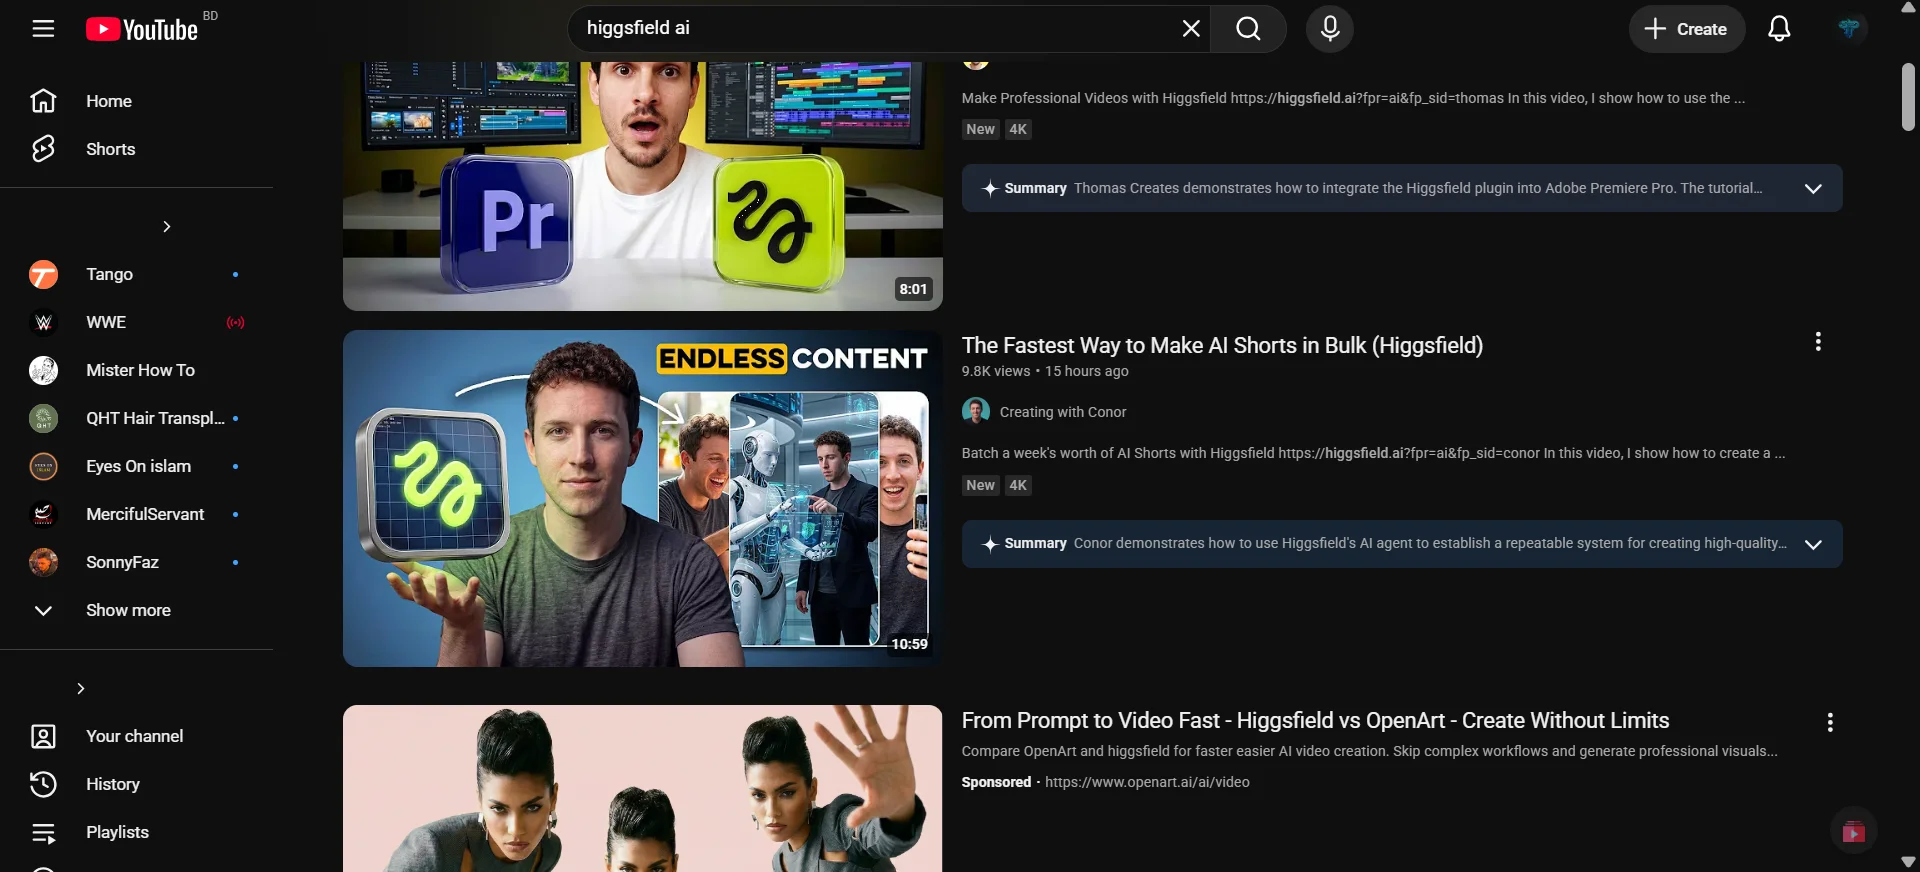
4. Watch the video for more than 3 minutes with "Loop" and "Stats for nerds" enabled
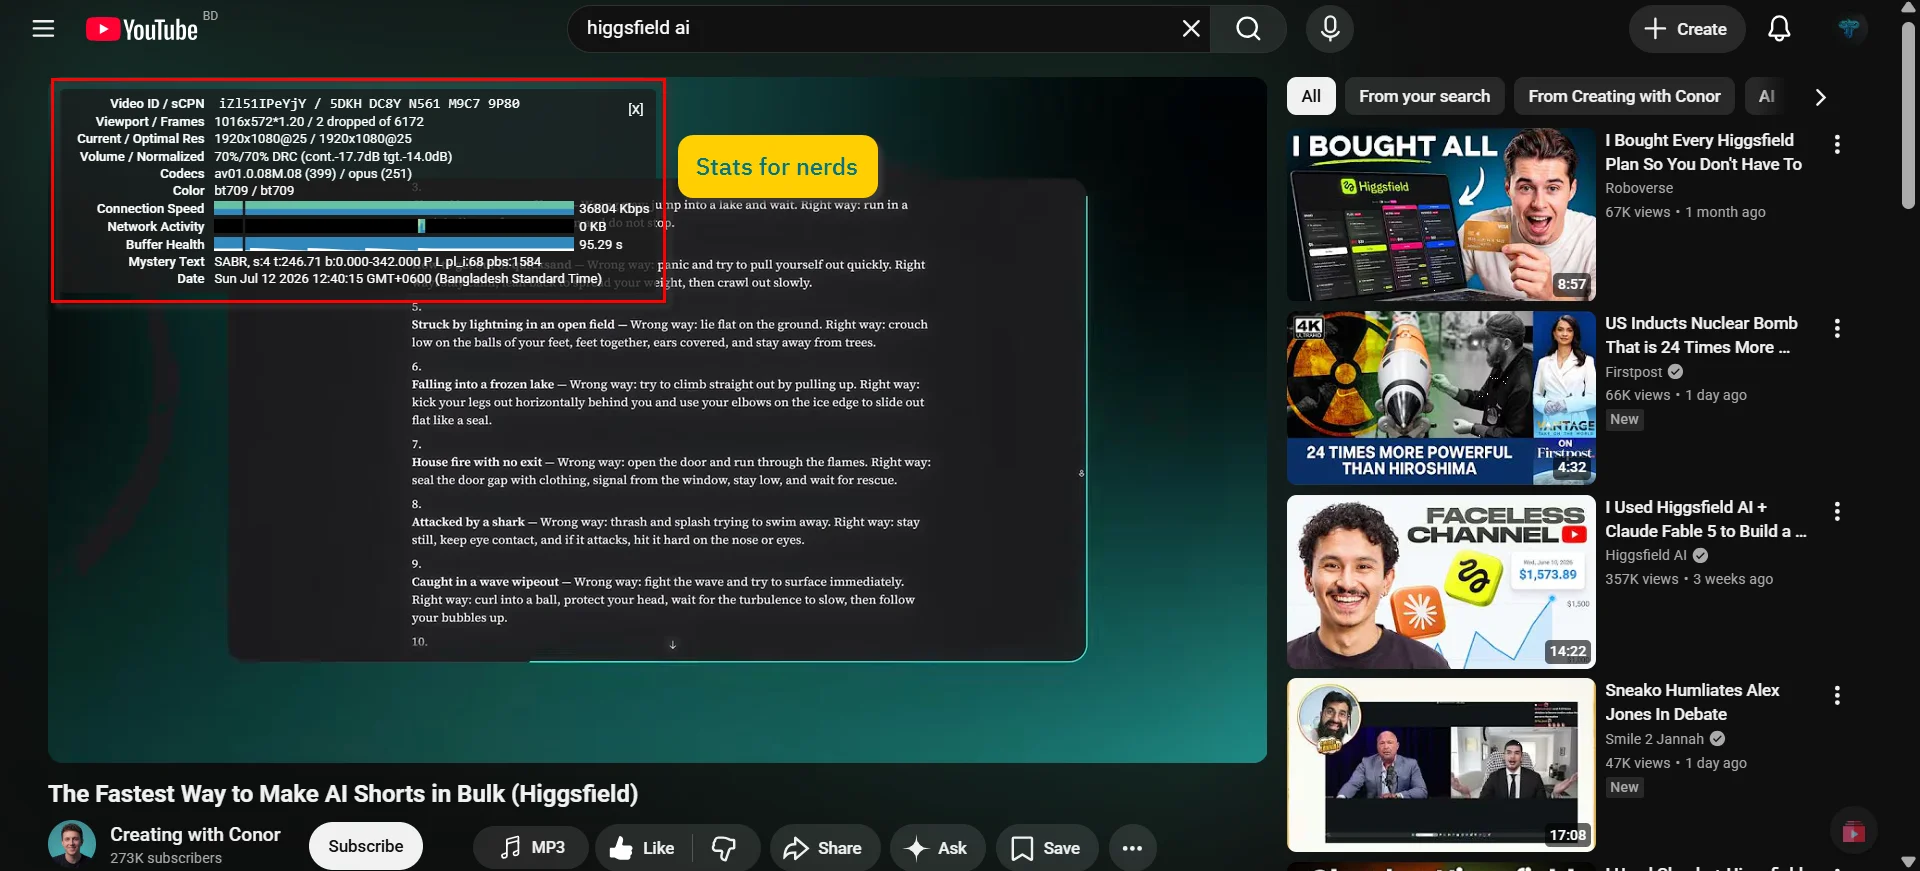
5. Take a screenshot and upload it as proof in the "Choose File" section. Then click on "Submit Proof"
The following platforms mentioned below require you to have a real/personal IP address. If you live in Tier 3 countries such as Bangladesh, Pakistan, South Africa, etc - you have to make sure you have a real IP address to avoid getting banned. Tier 1 and Tier 2 countries normally have "real IP" by default. If your Wi-Fi does not have a real IP address, you will be considered as a VPN user - which is not legal and can lead to account ban. So for Tier 3 countries, the best option is to use Mobile Data. Your IP address is your identity on these platfroms - so if they are not unique and consistent, your account will be banned
Example 1
If you want more earning flexibility like a 12 year old, you still have options. All you need to know is proper English. Here is a step by step guide:
1. Create an account and verify your email
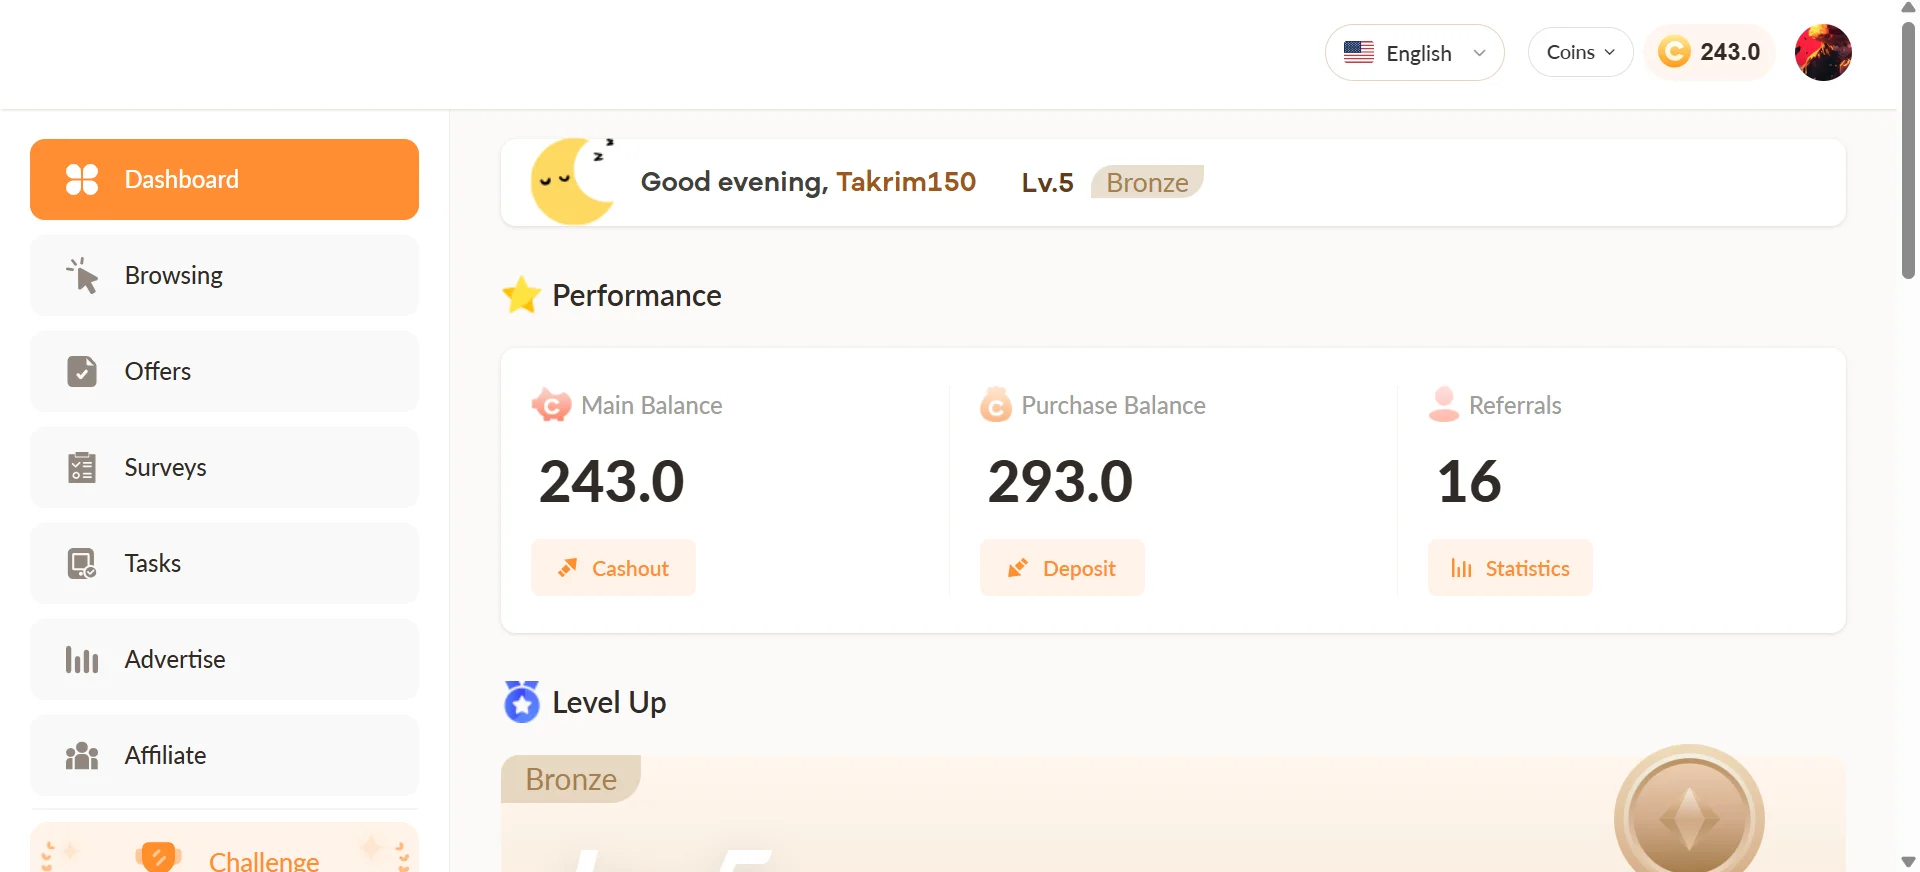
2. Visit your Dashboard which looks like this below:
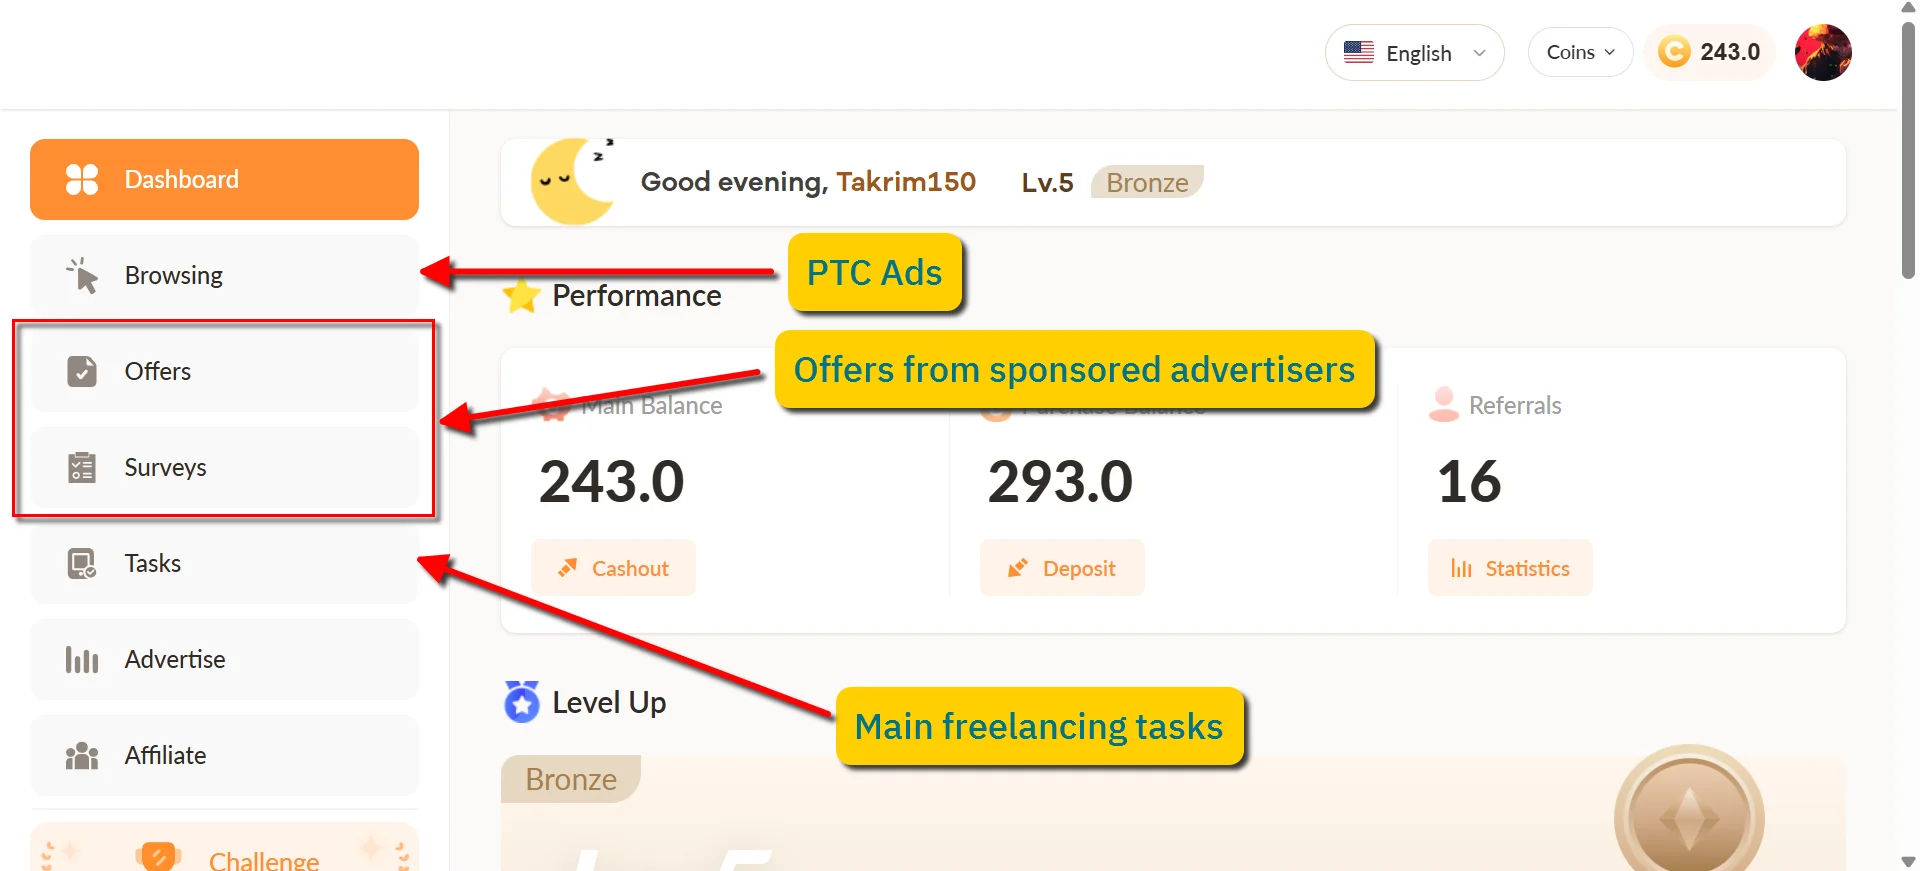
3. There are various ways to earn. Some of them are labelled below:
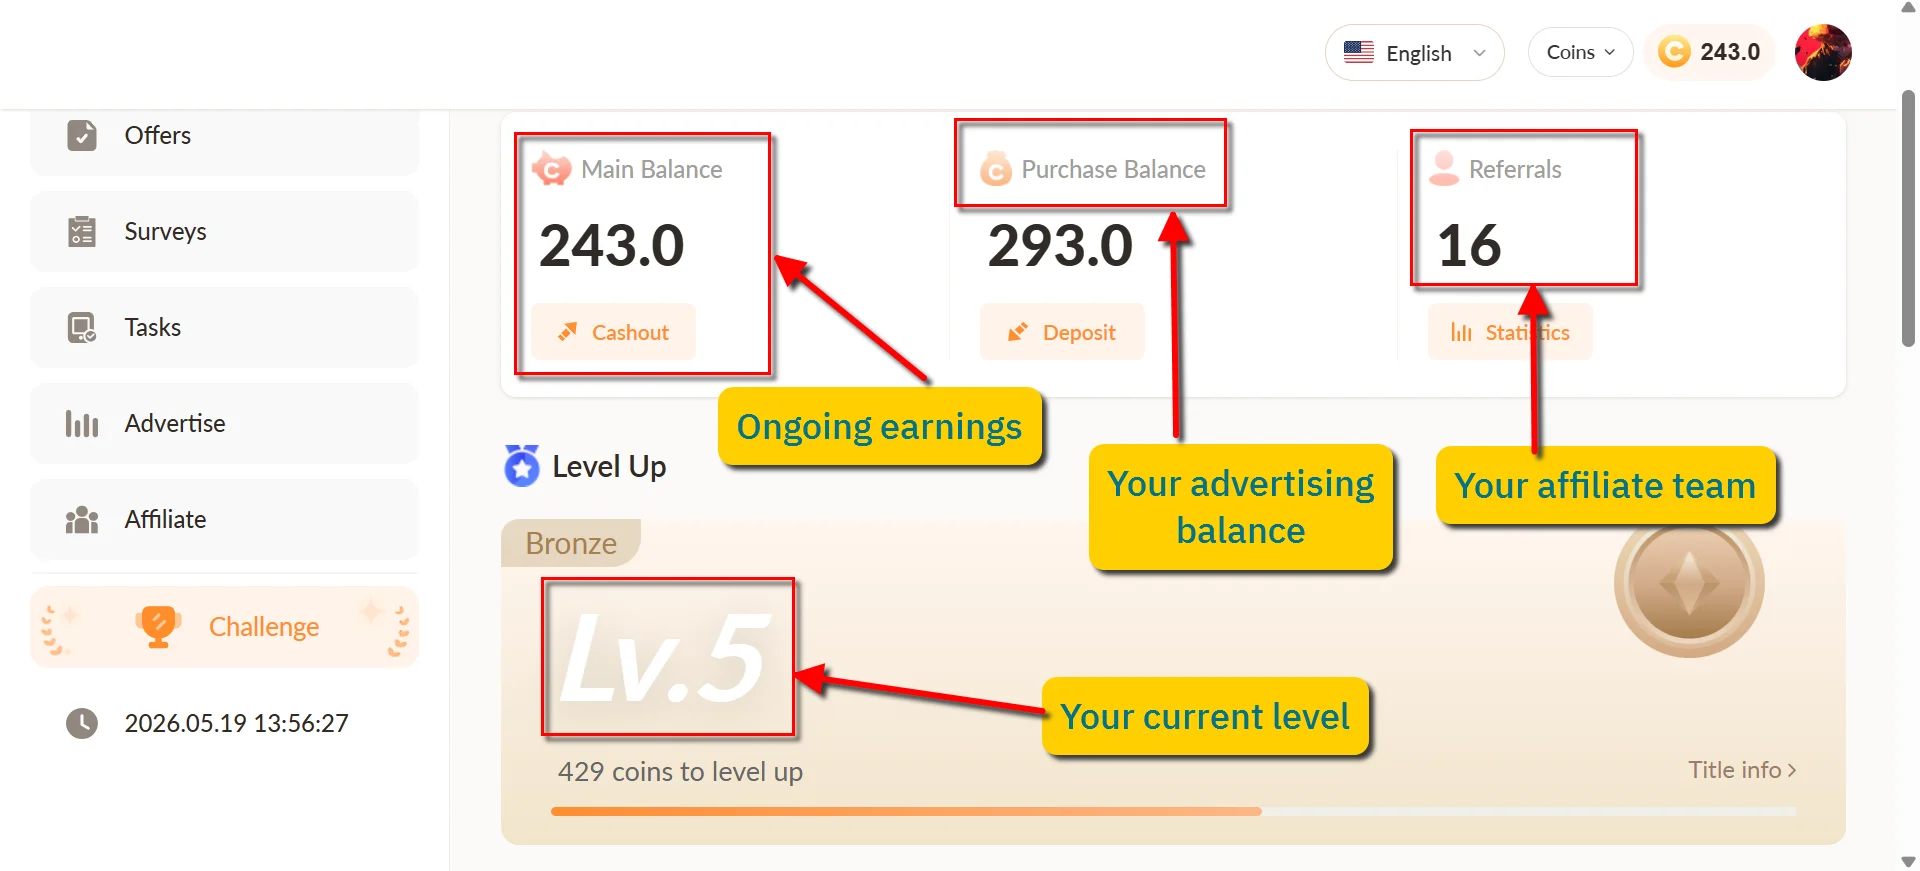
4. Take a look at the descriptions of important aspects in your dashboard
5. The offers section include paid offers from sponsors and advertisers
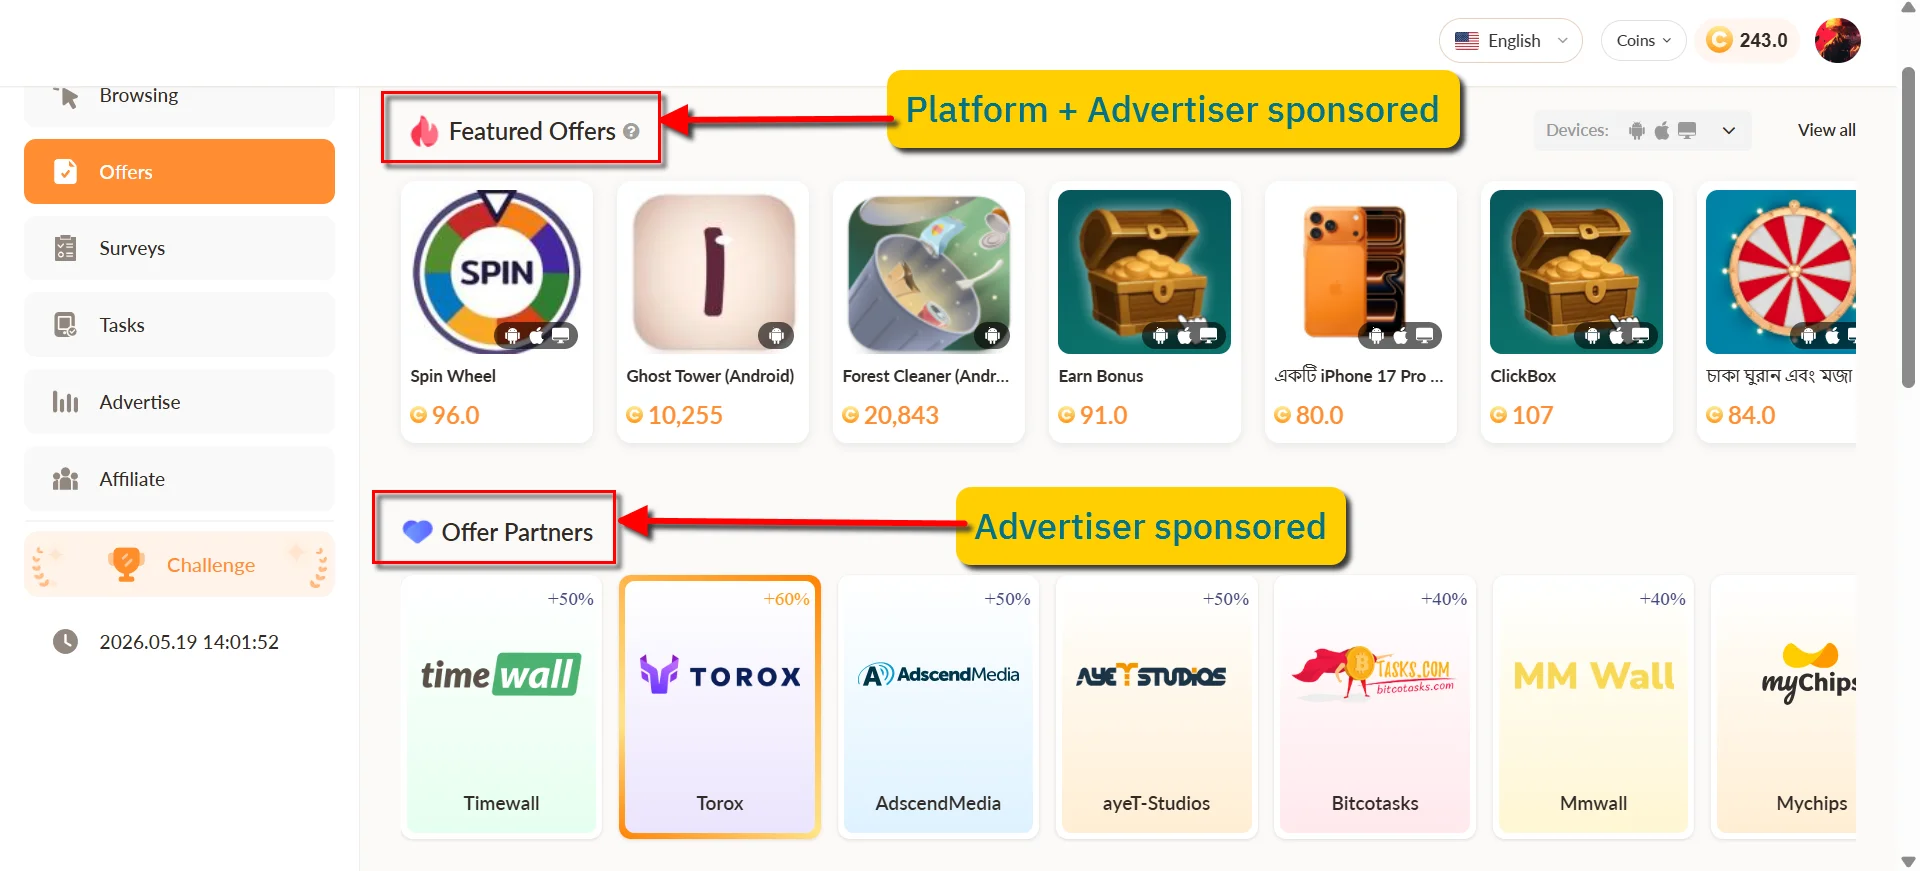
6. A quick look at how the "Offer partners" looks like. If you are wondering why do they pay you for playing games - they are not paying you for playing games. They are giving you commission of the revenue from ads that appear in the middle of the game
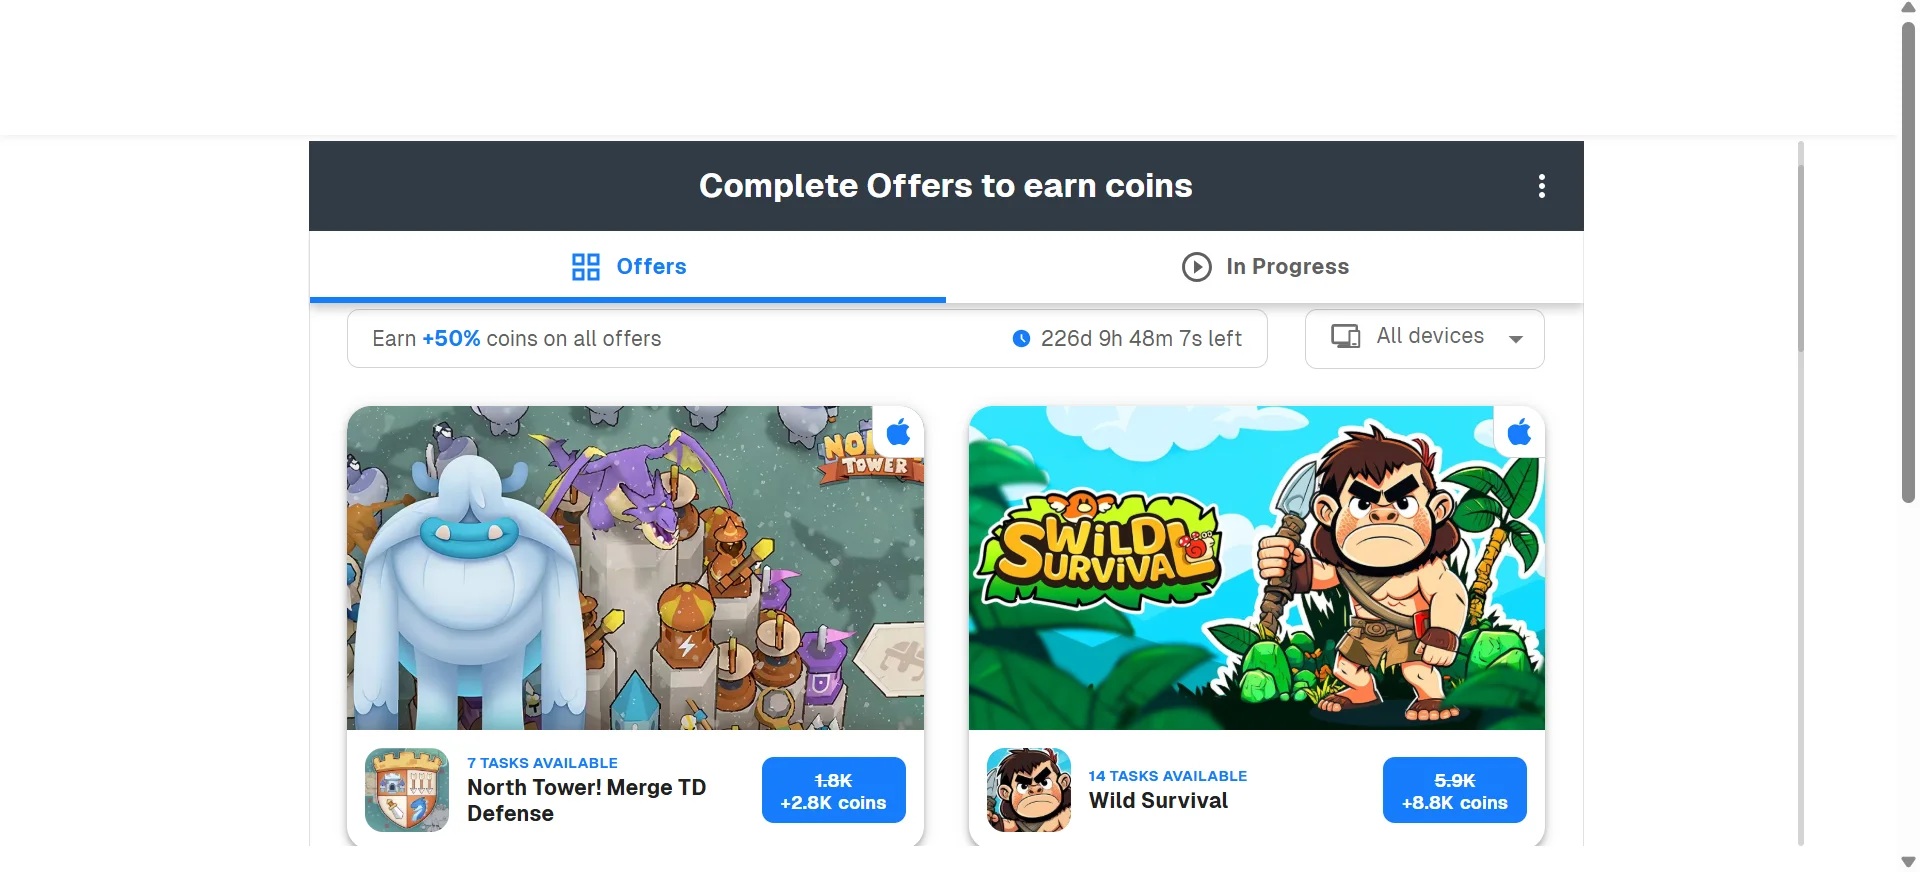
Let's take a look at one of the earning methods: PTC Ads
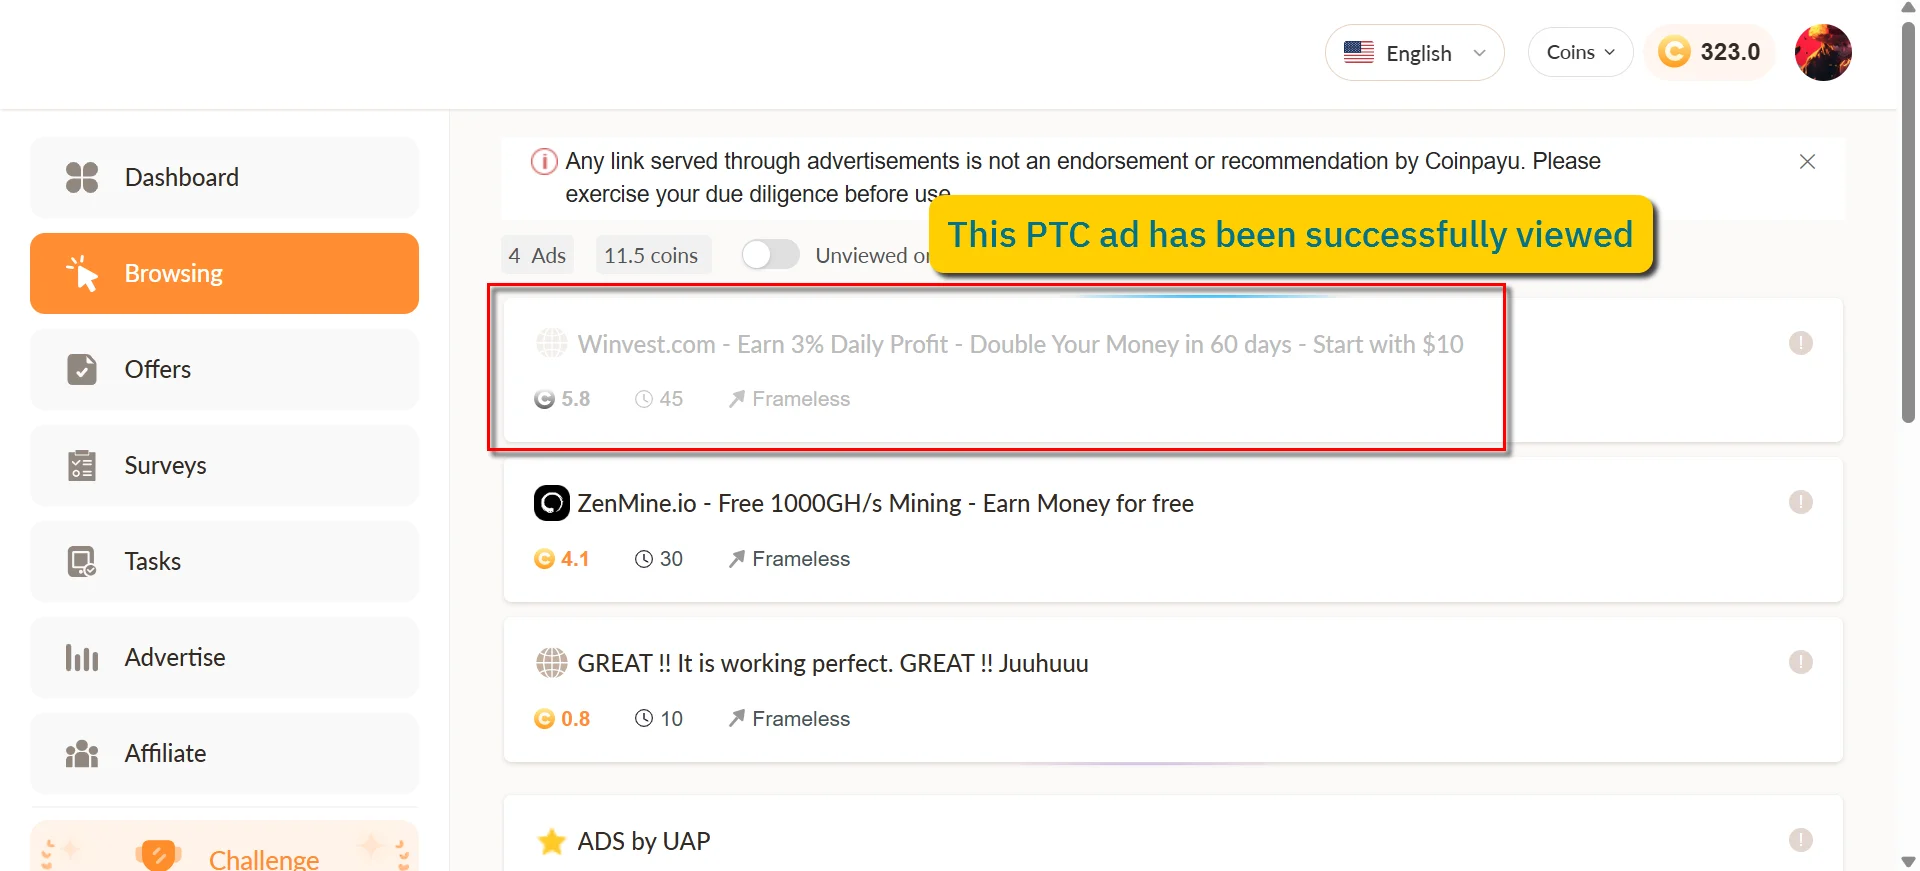
1. Go to the "Browsing" section that looks like this below. We will click on the first one:
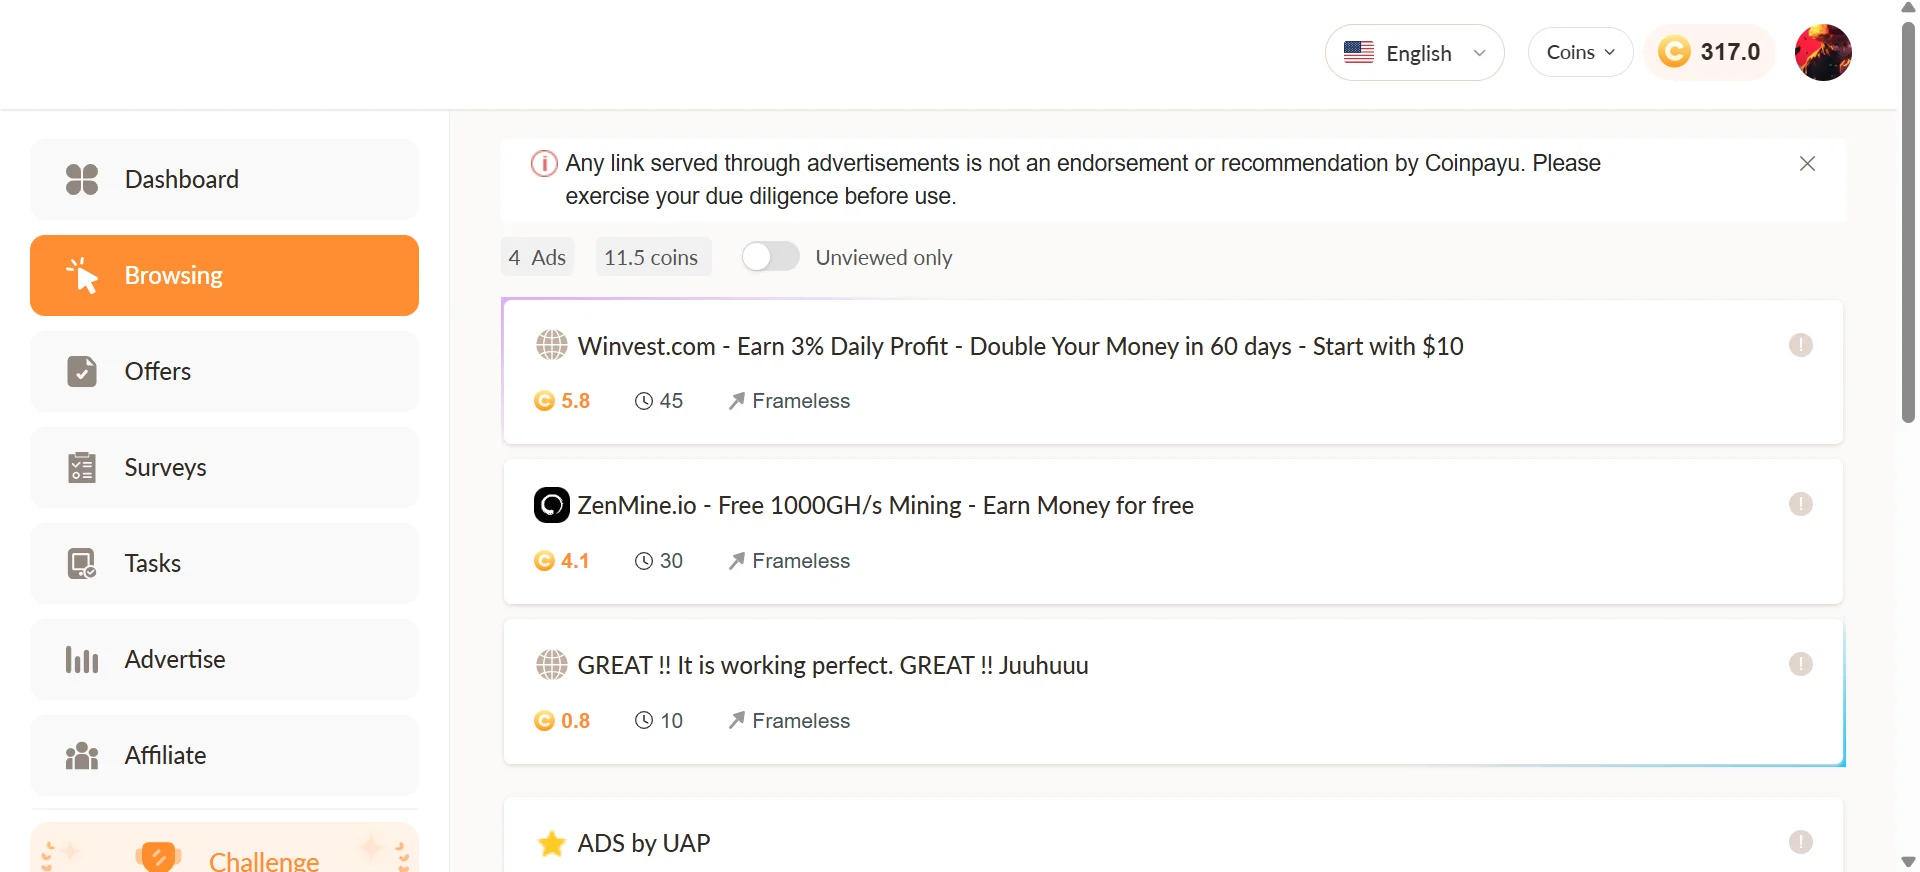
2. The PTC Ad will open in a new tab called the "Active tab" - you have to stay in that tab until the timer ends
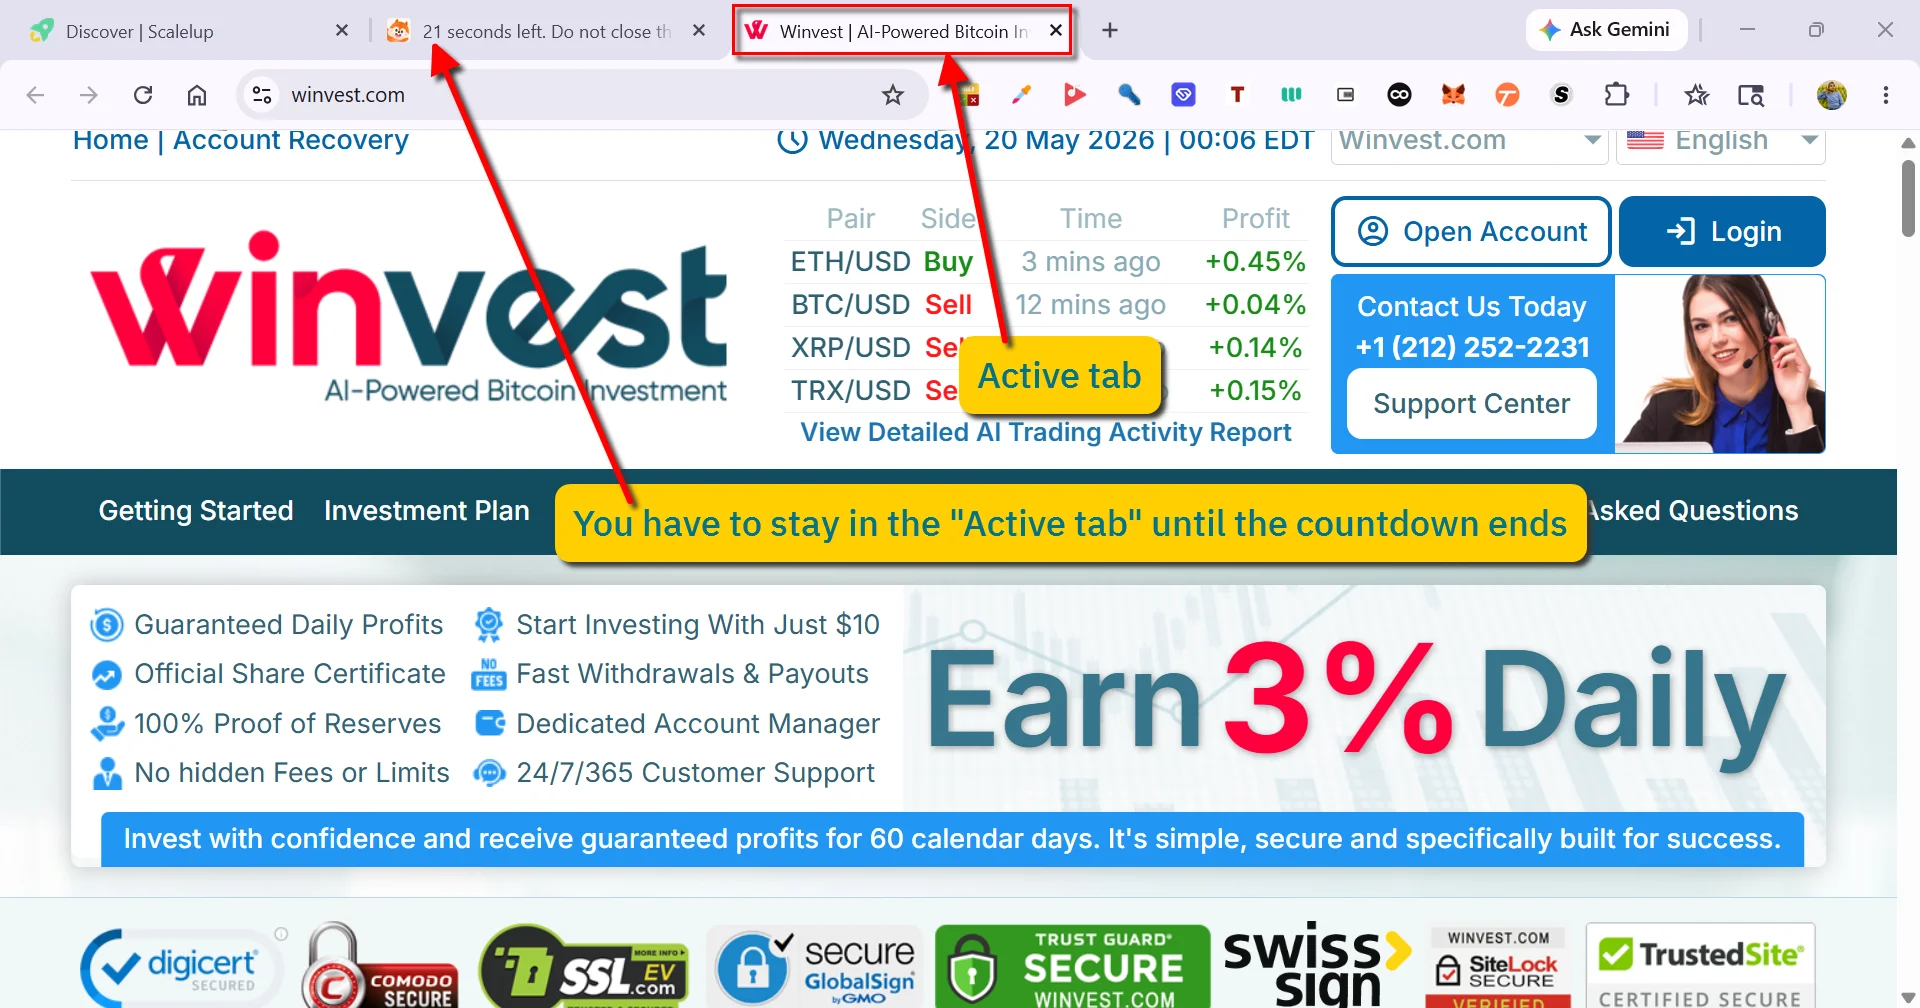
3. Once the timer ends, you can close the Active tab and the coins will be credited to your account
If you want more earnings, you can go to the "Tasks" section which is the core freelancing section. This is similar to the previous section on the other website mentioned earlier
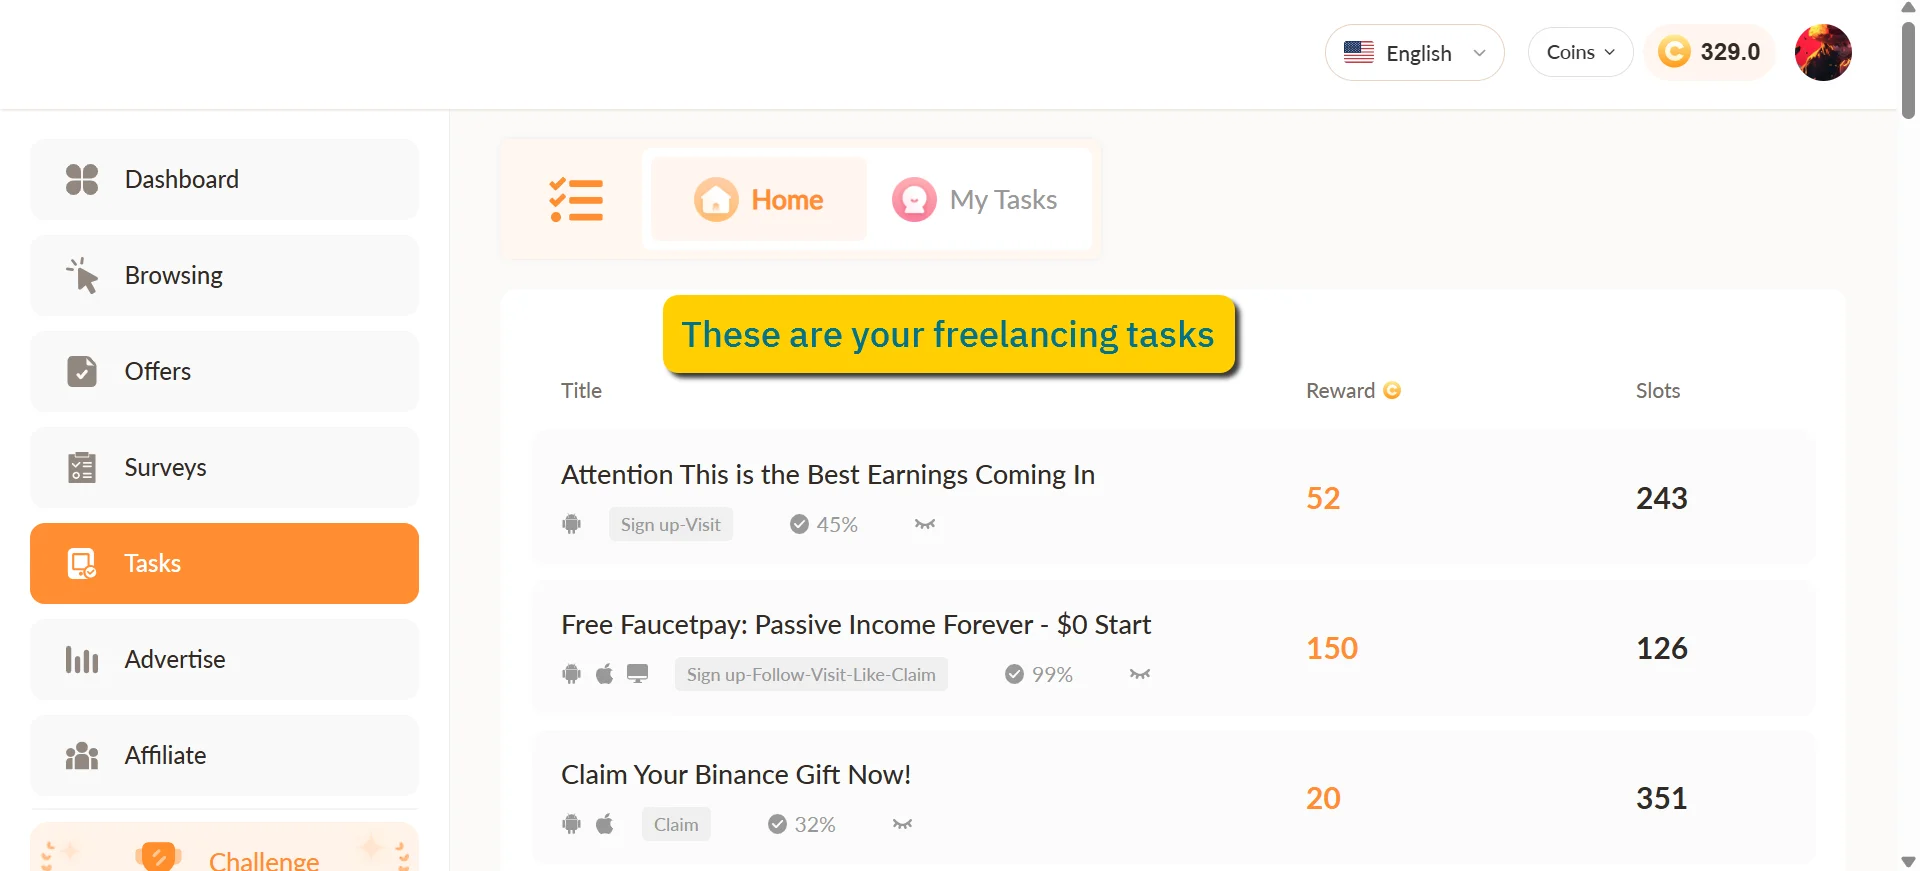
Example Task
Let's look at a simple freelancing example task below:
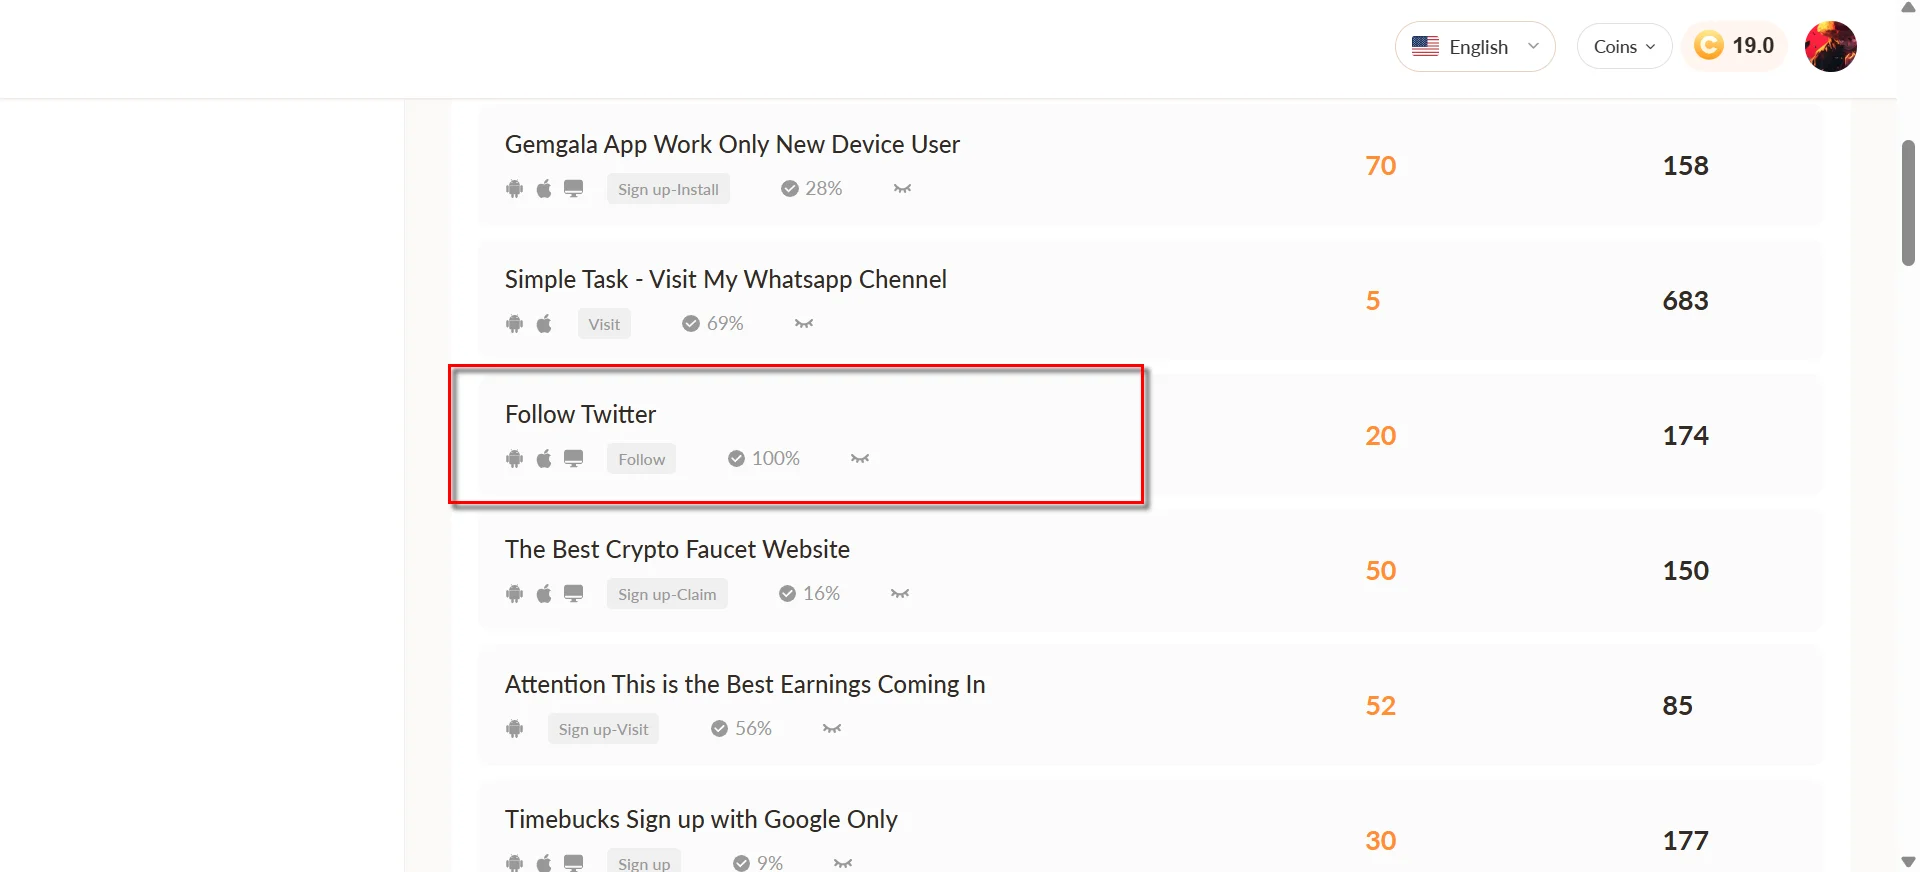
In the "Tasks" section, we will pick a task to complete. Let's pick the one shown above in red highlight. Once clicked, it will open the task panel shown below:
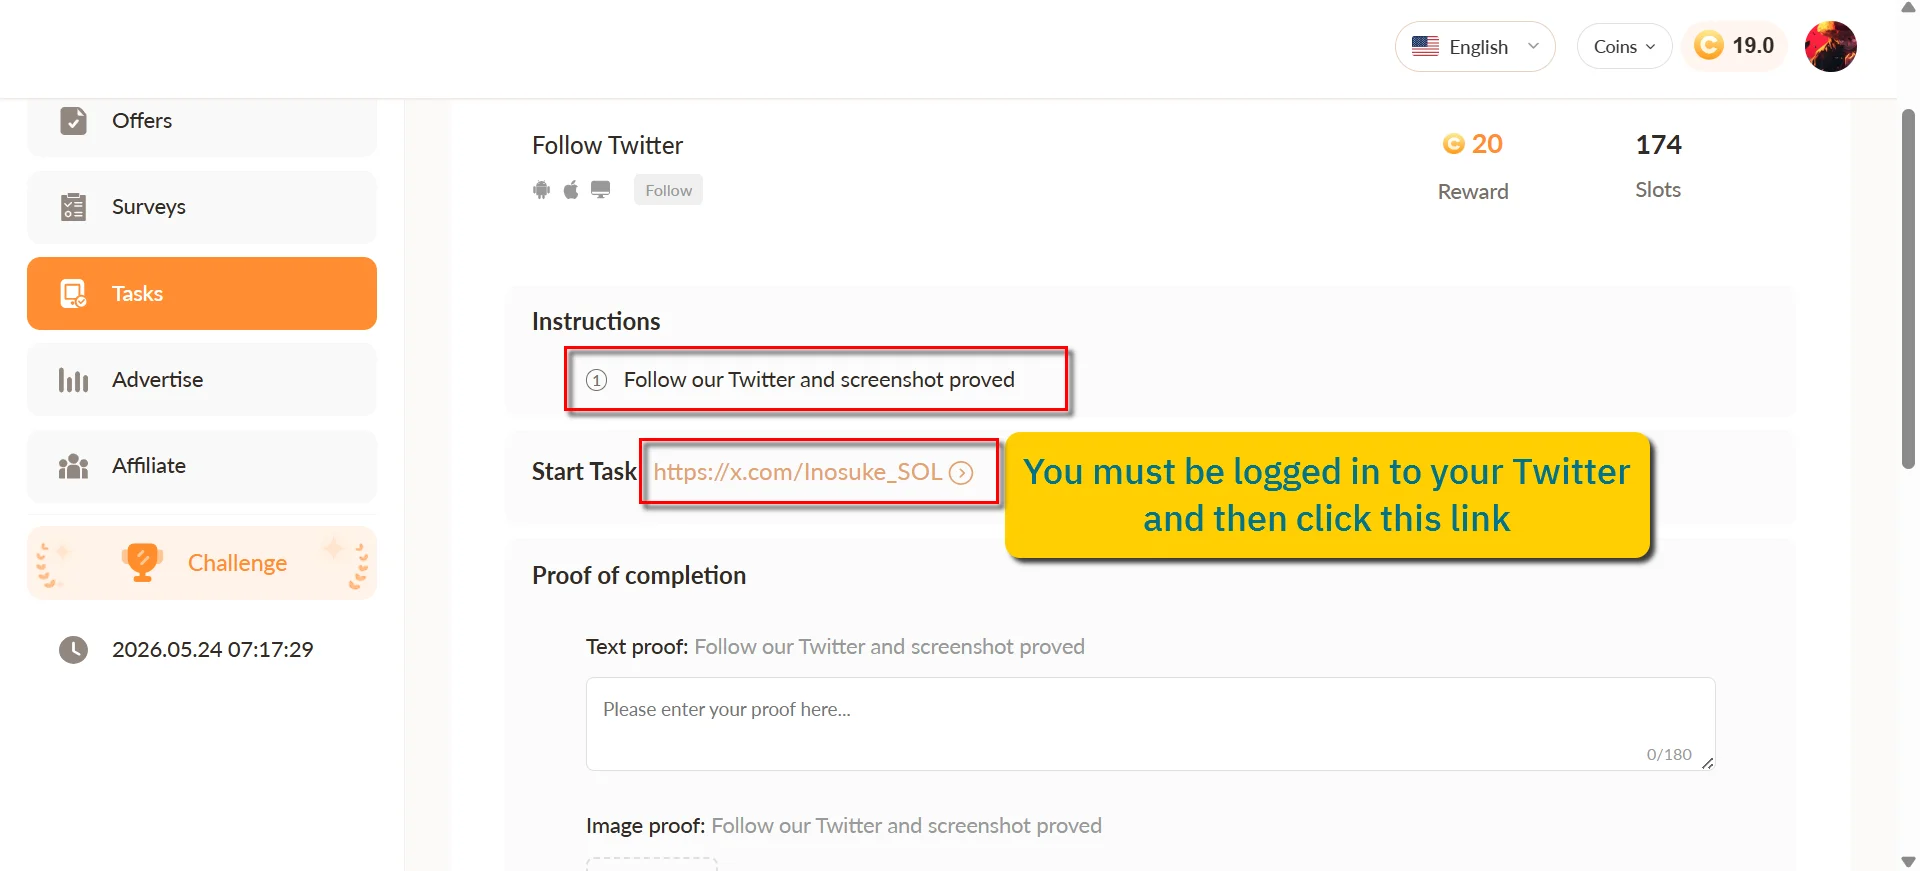
Next to the "Start Task" you will see a link. Click that link and it will open in a new browser tab showing the account that you need to follow:
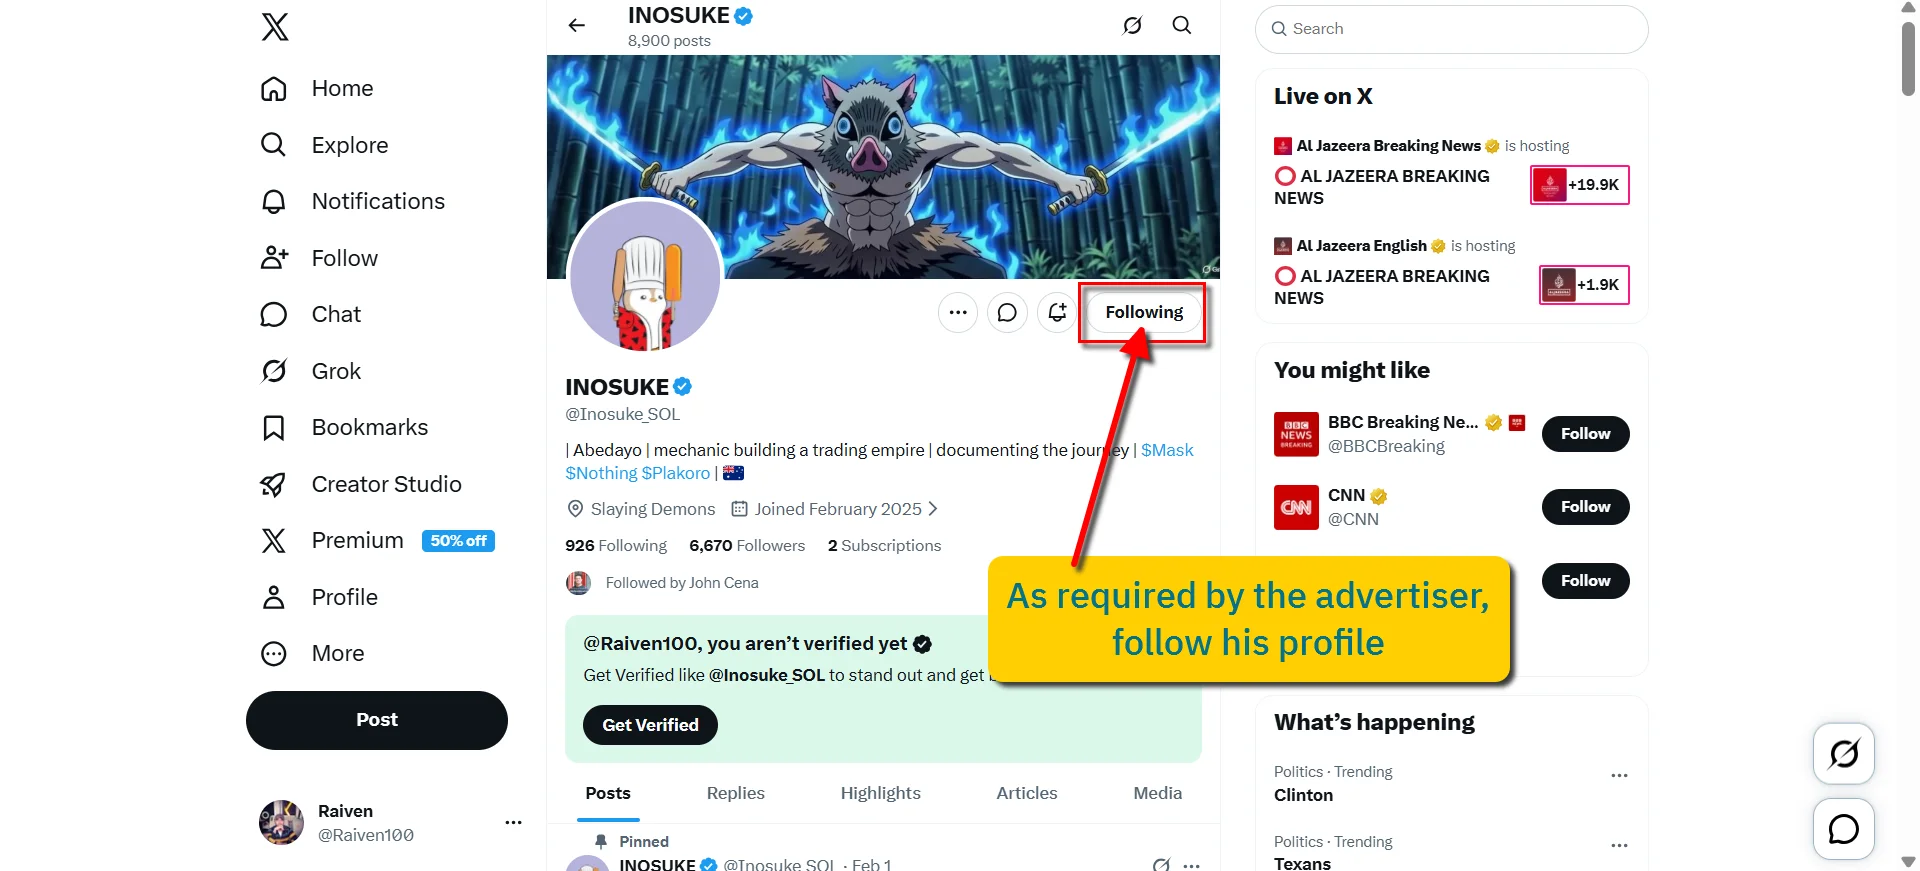
Take a screenshot after following the advertisers profile and save it to your device. Then go back to the work panel and upload it as proof
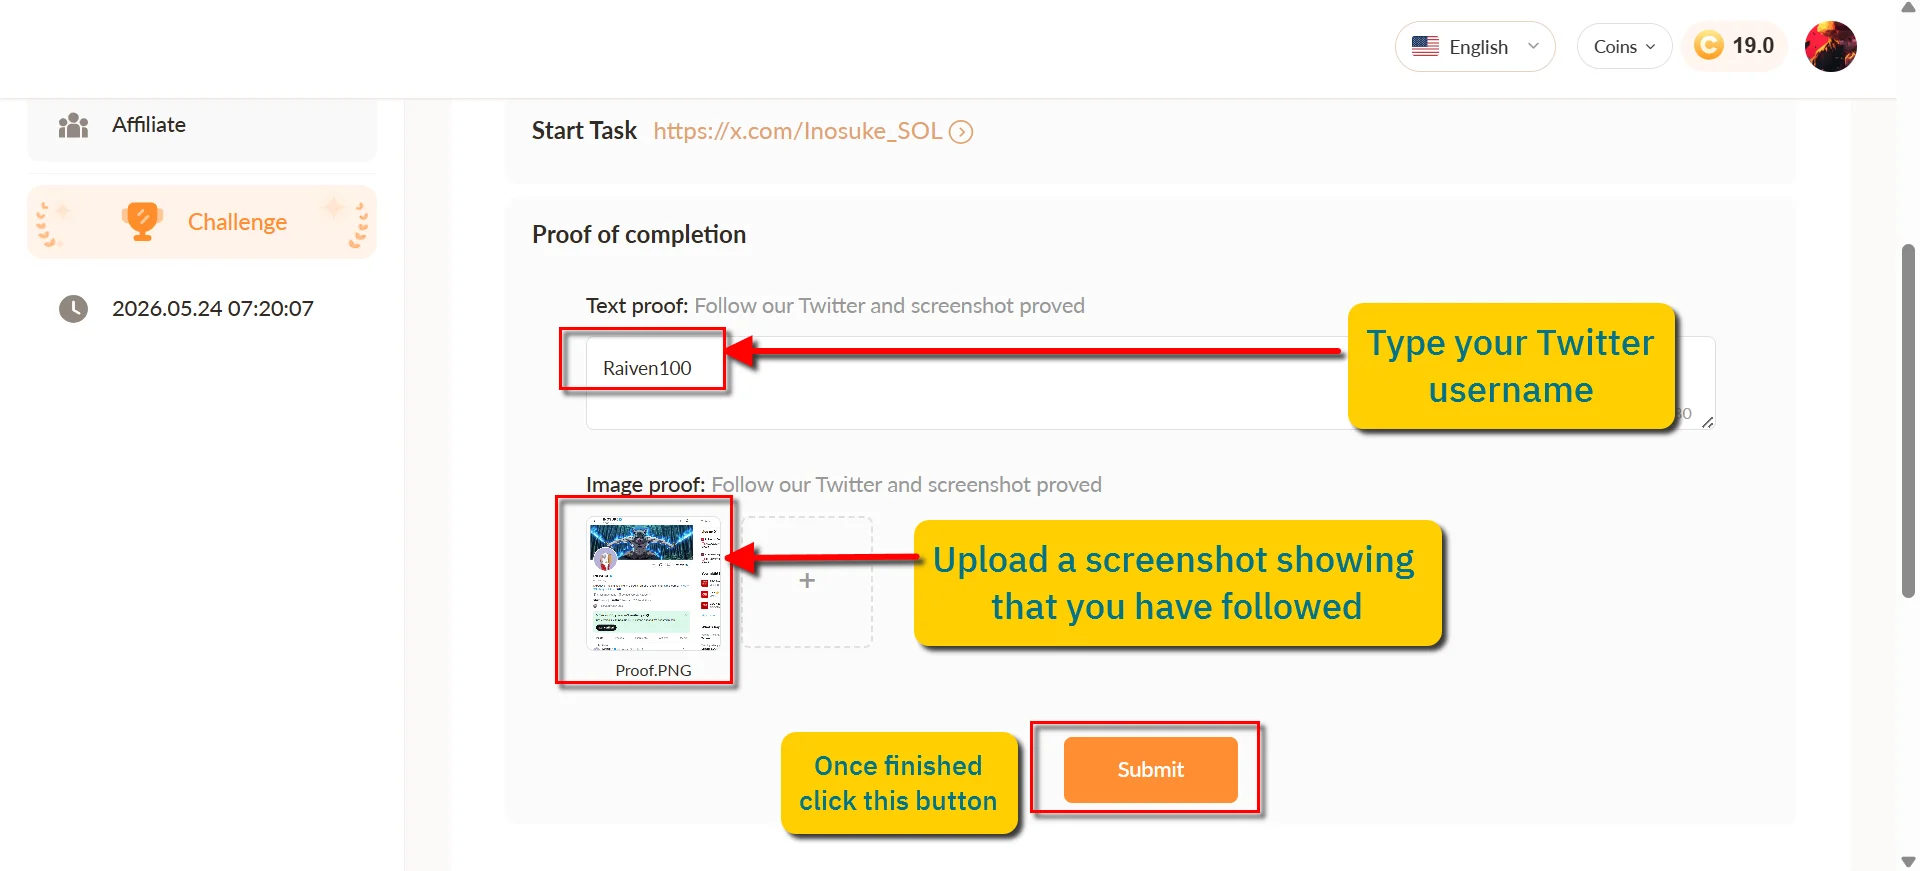
Once you have uploaded the screenshot and provided your Twitter username, click the "Submit" button. Your task is complete and will be moved to "Pending approval" until it is marked or seen
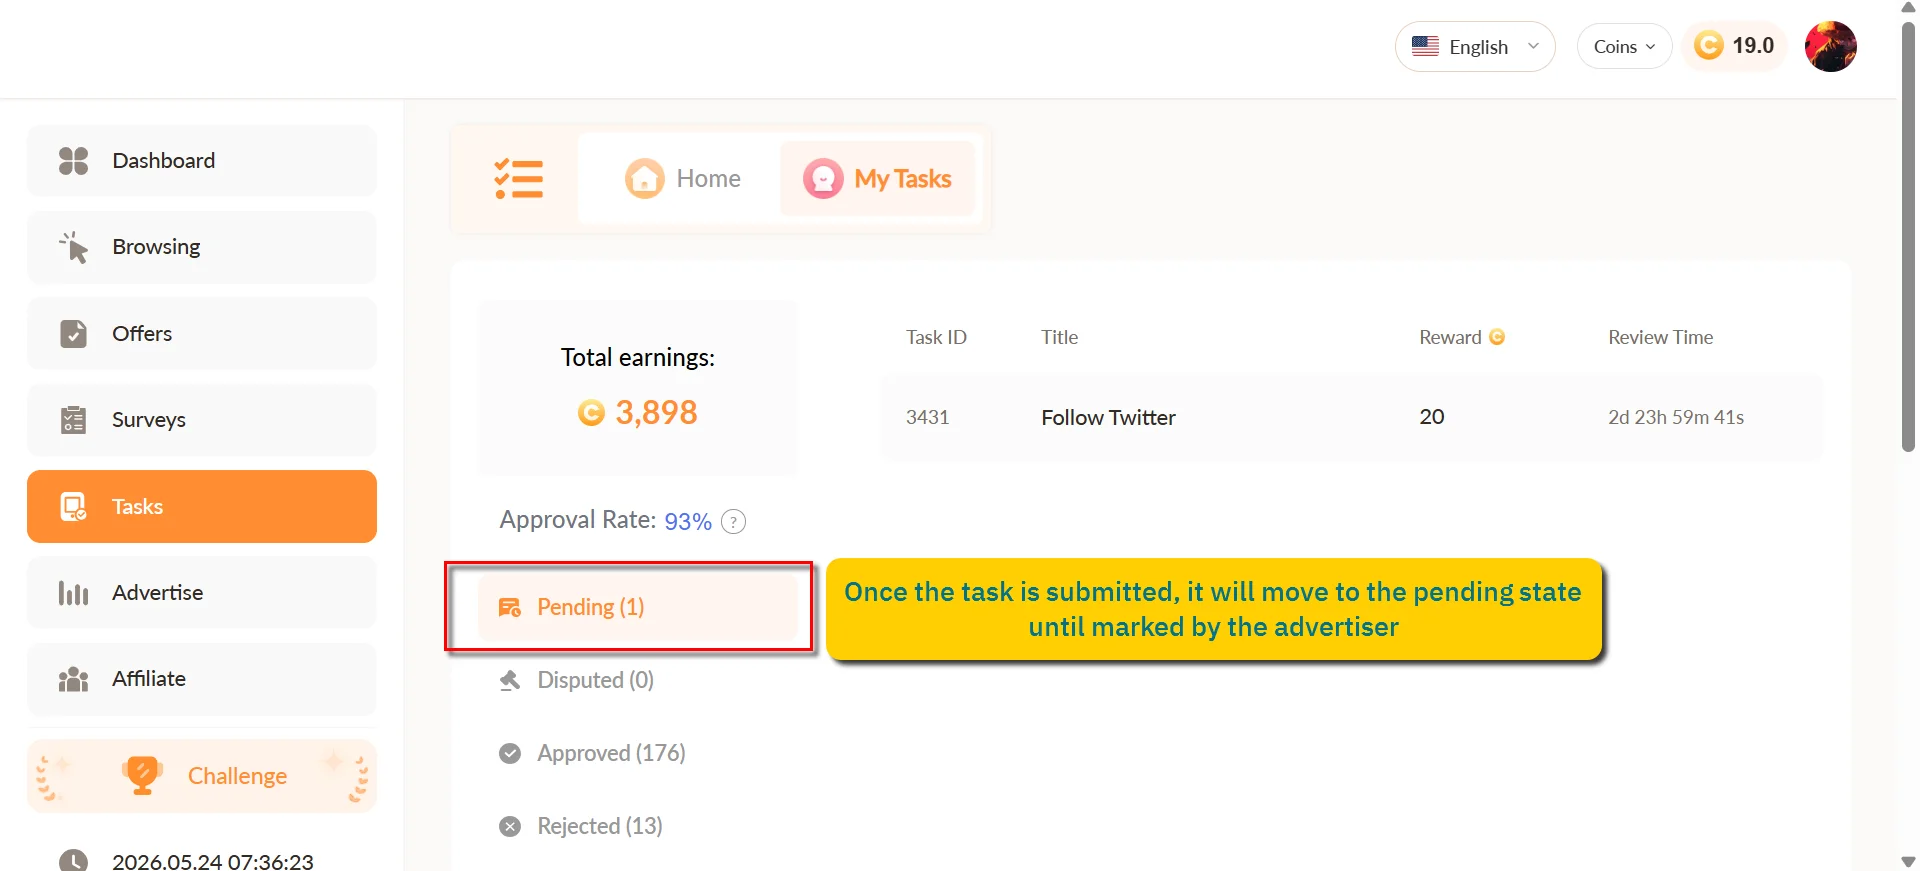
Once approved, the money will be added to your account balance
If you are interested in more such earning sites, you can try visiting or
Easiest Options: Part 2
Another easy way to earn is through faucet claims. The idea is that you solve a captcha every hour to claim an amount of money which depends on your level. Follow the steps below to get started
1. Create an account and verify your email. You will find the verification prompt message on the notification bell icon
2. After verifying your email, visit your dashboard and you will get 10 bonus faucets under the "Bonus faucet" section. Claim them 10 times

3. Come back to your dashboard or "Hourly faucet", solve the catcha and claim your faucet
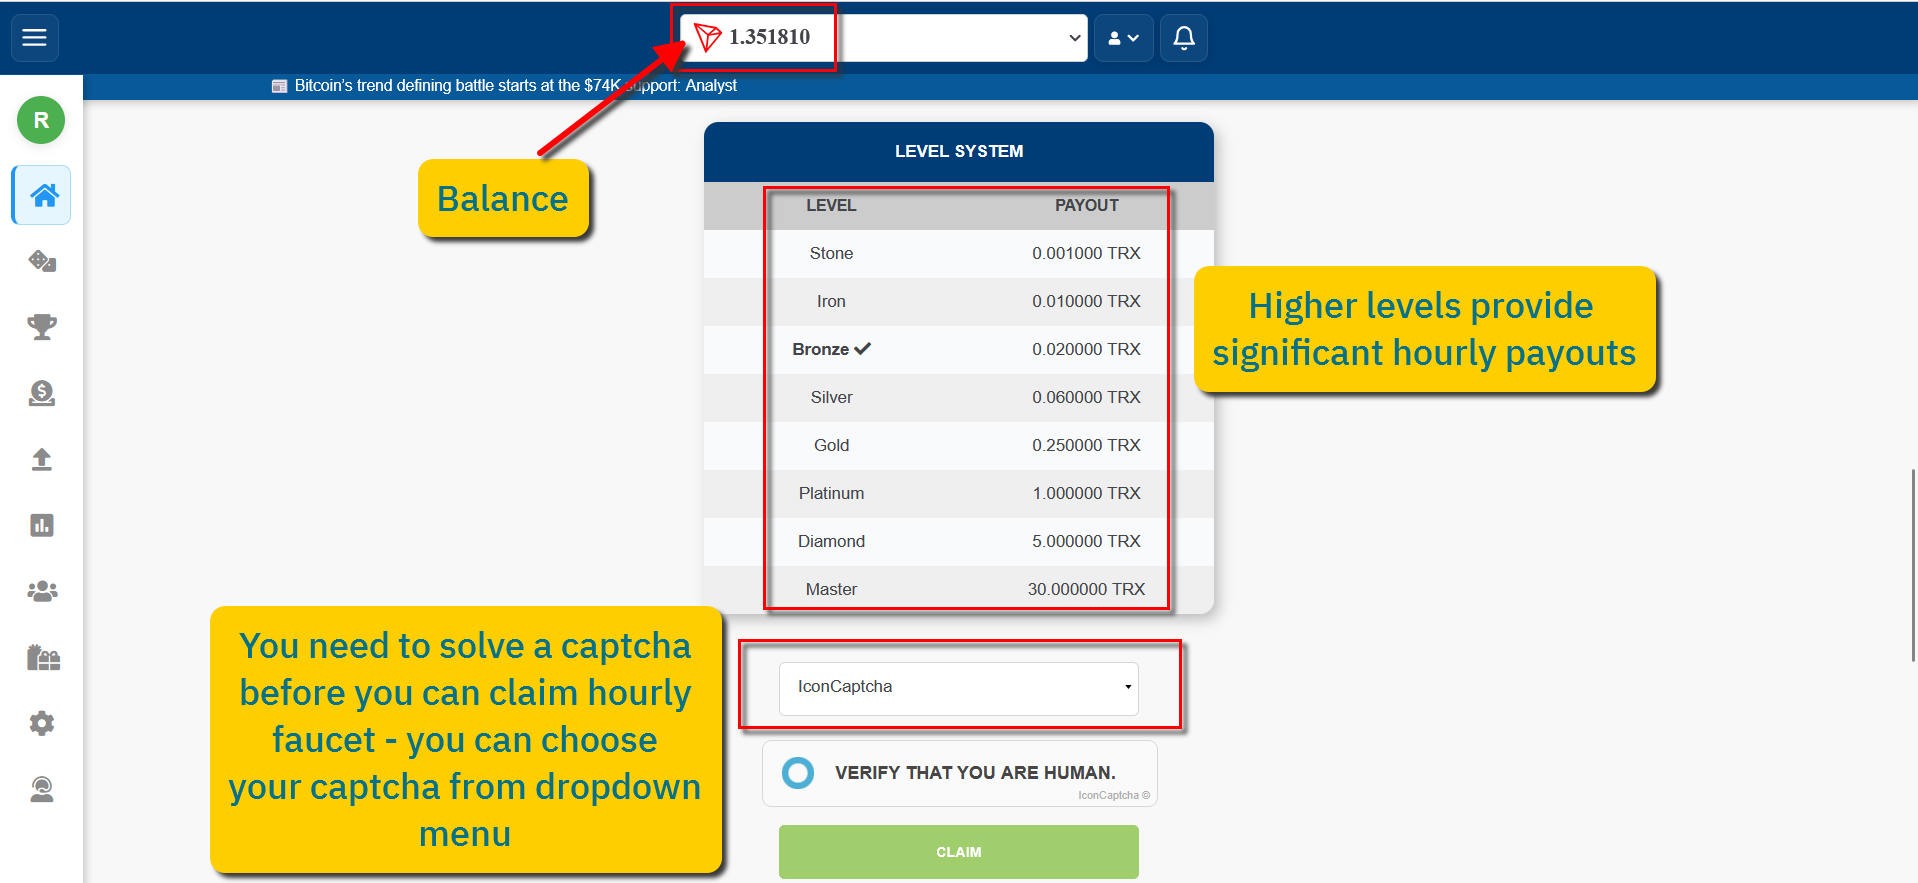
4. Once you claim your hourly faucet, you have to wait for 1 hour before can claim your free money again
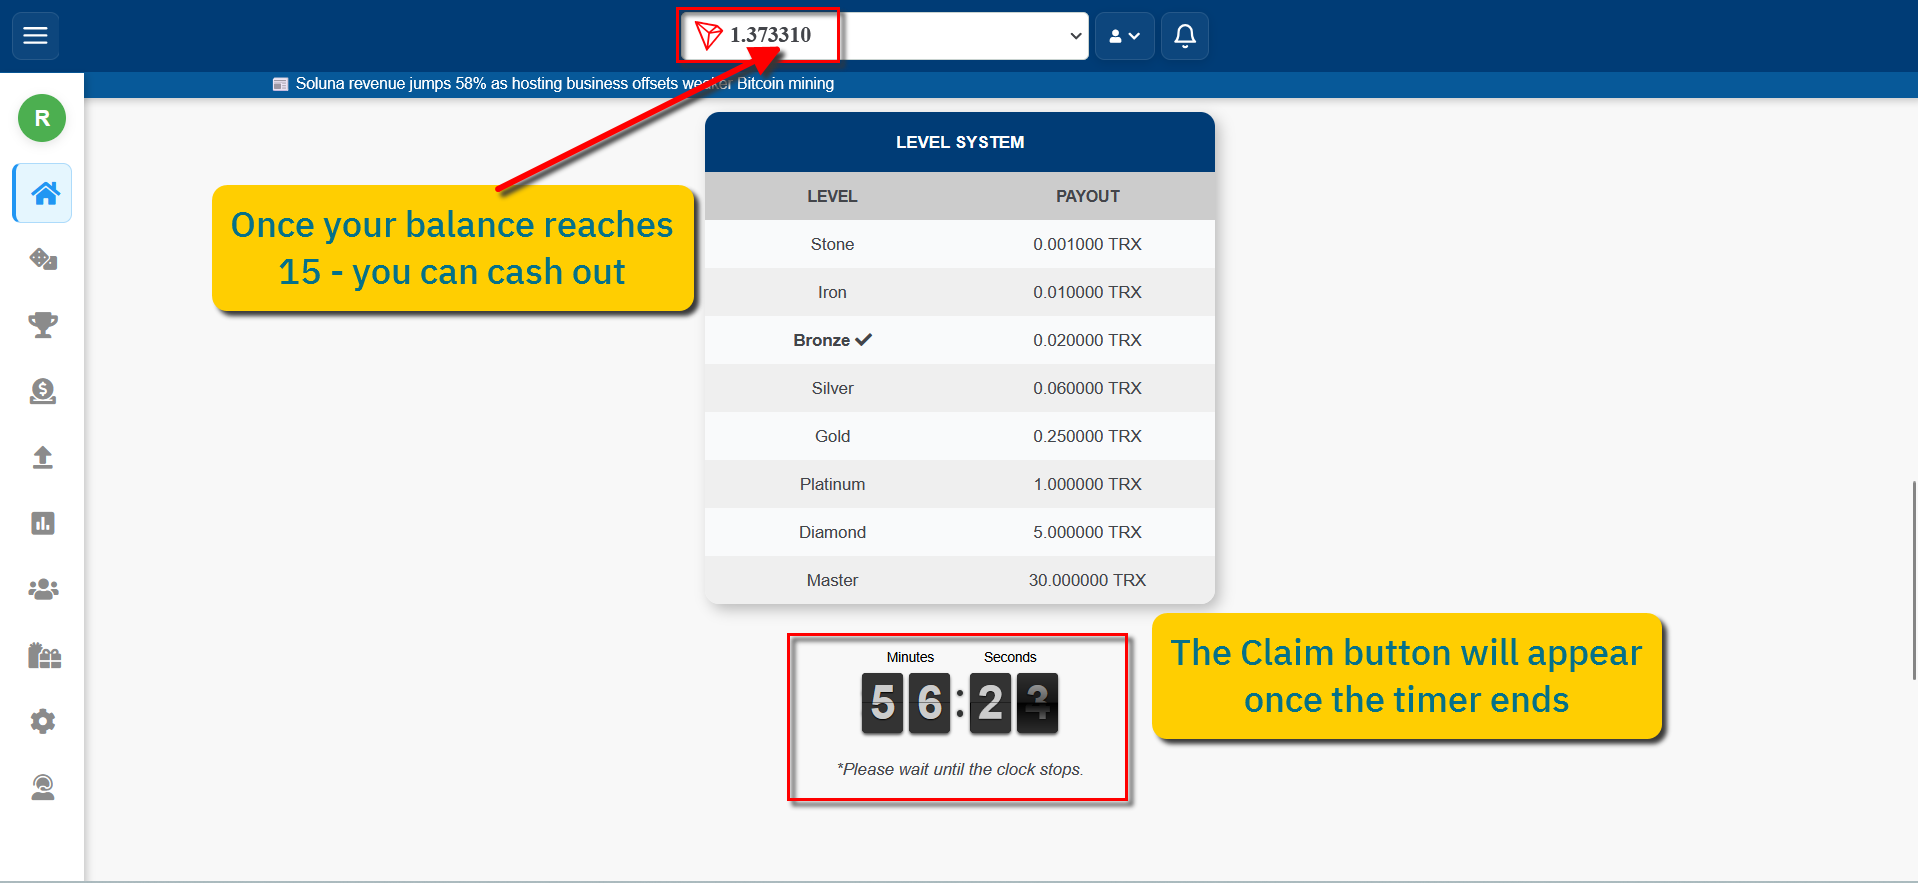
The "Double Bonus" is for new users only and lasts 24 hours
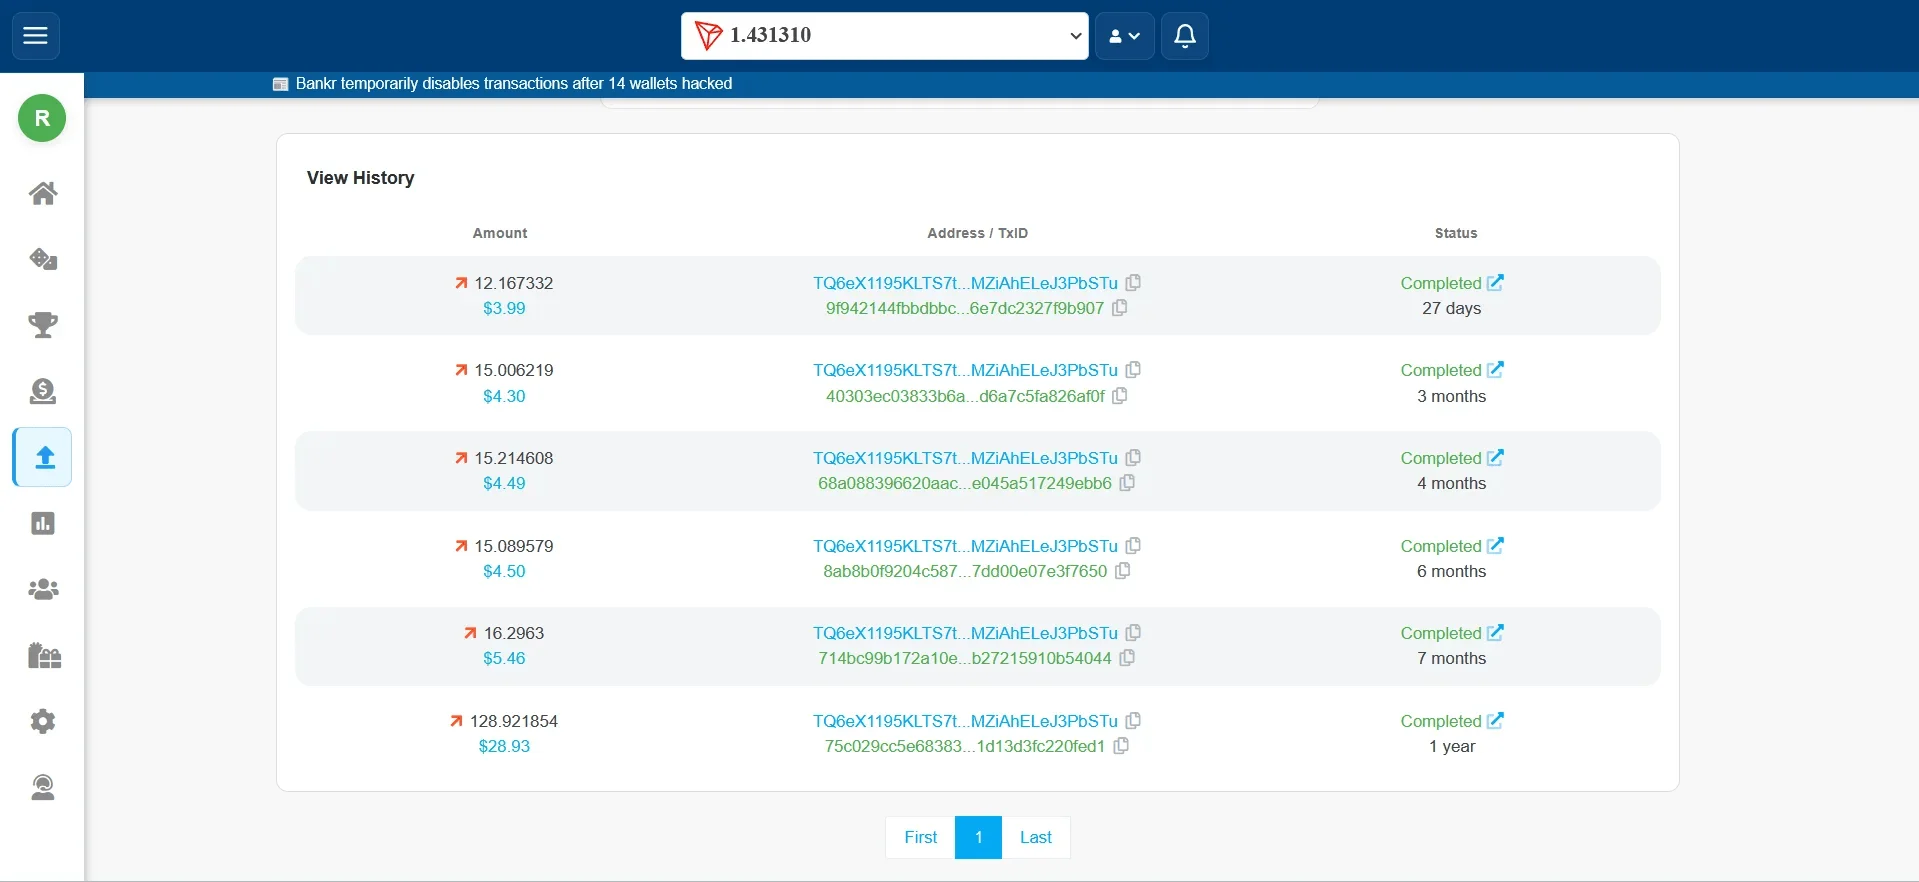
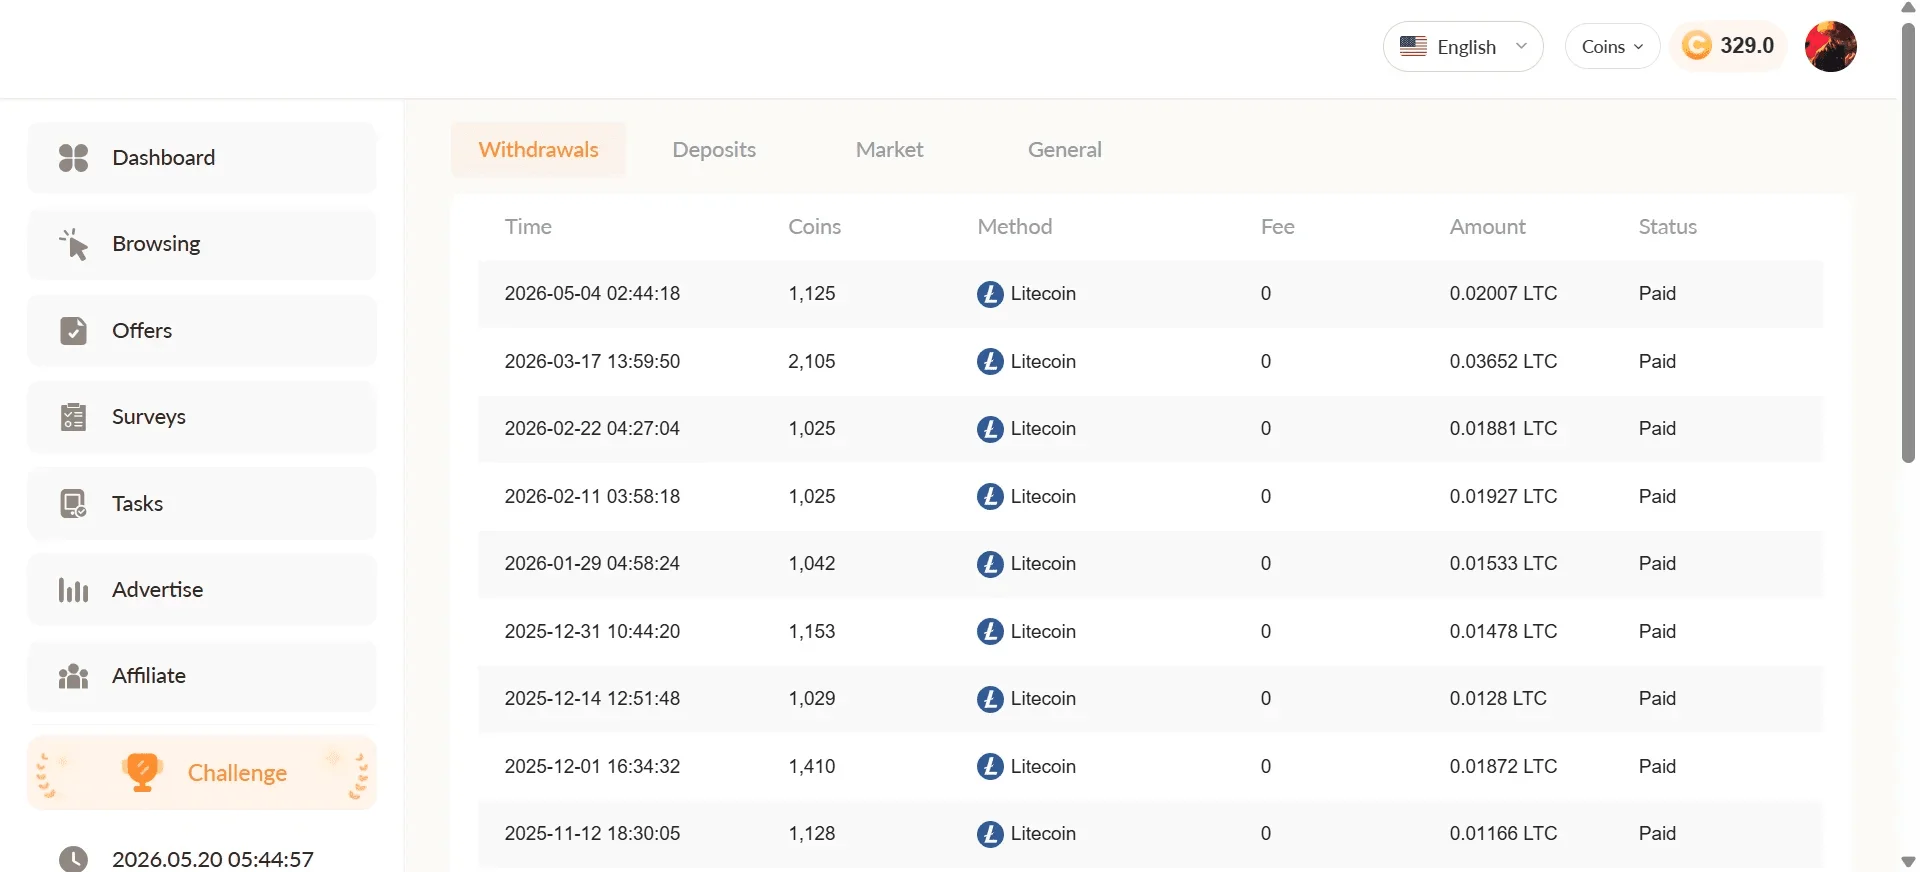
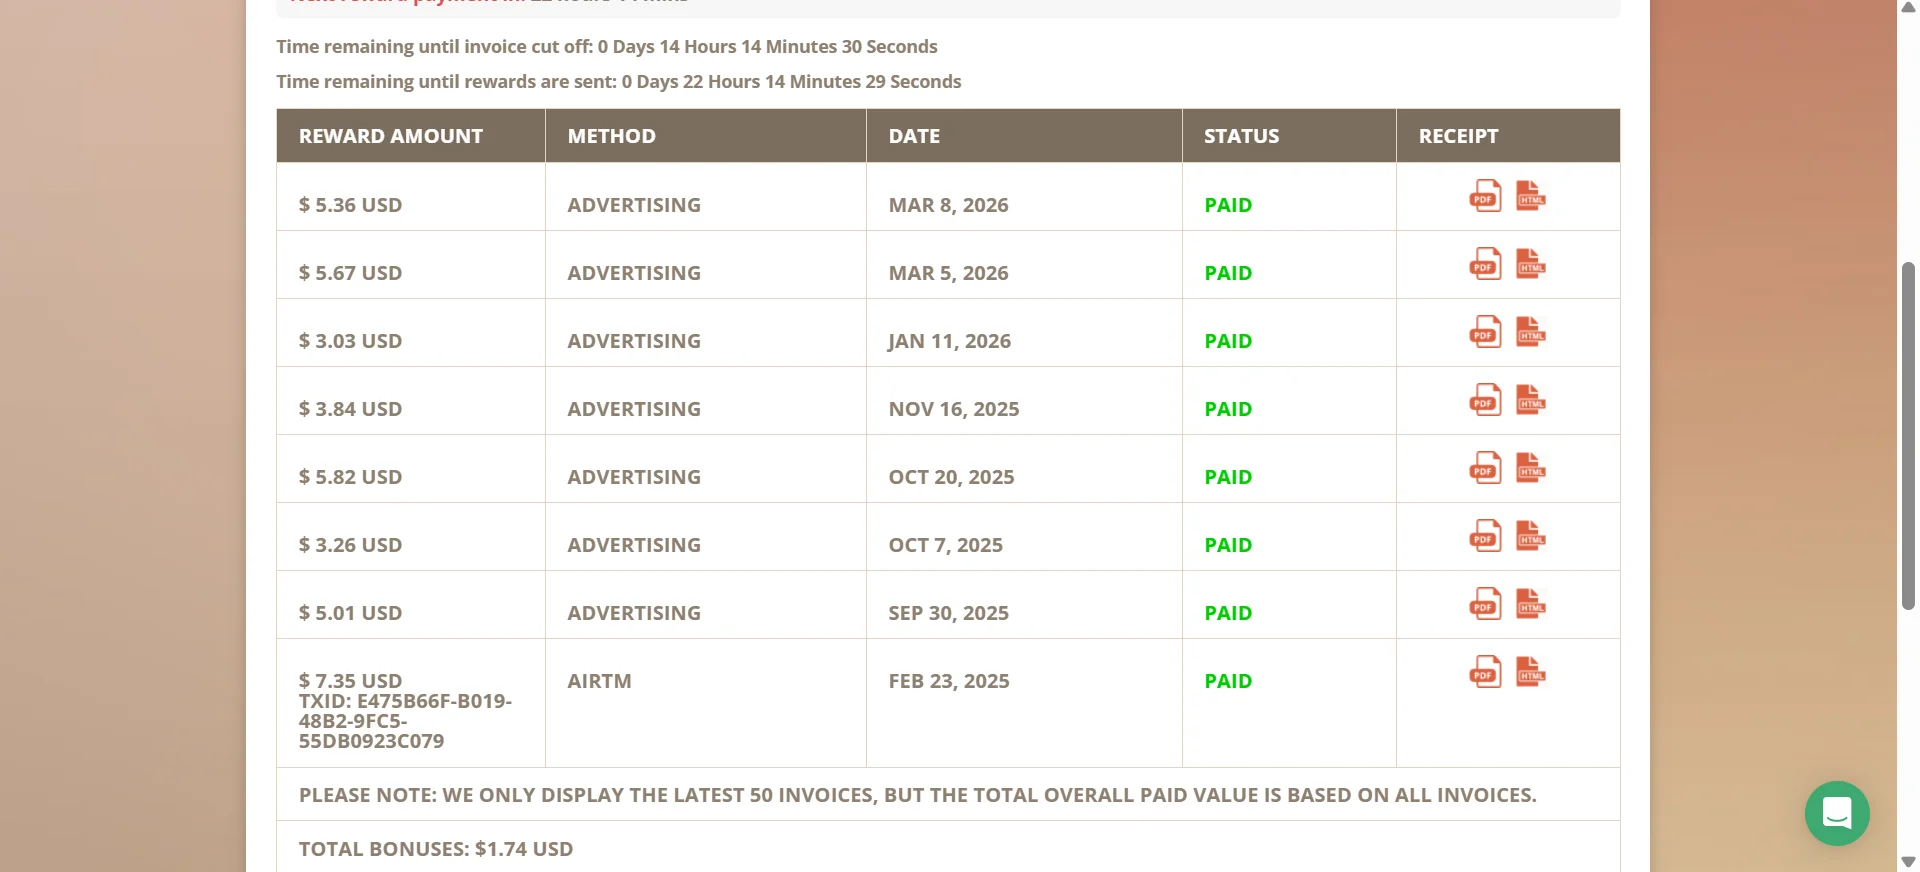
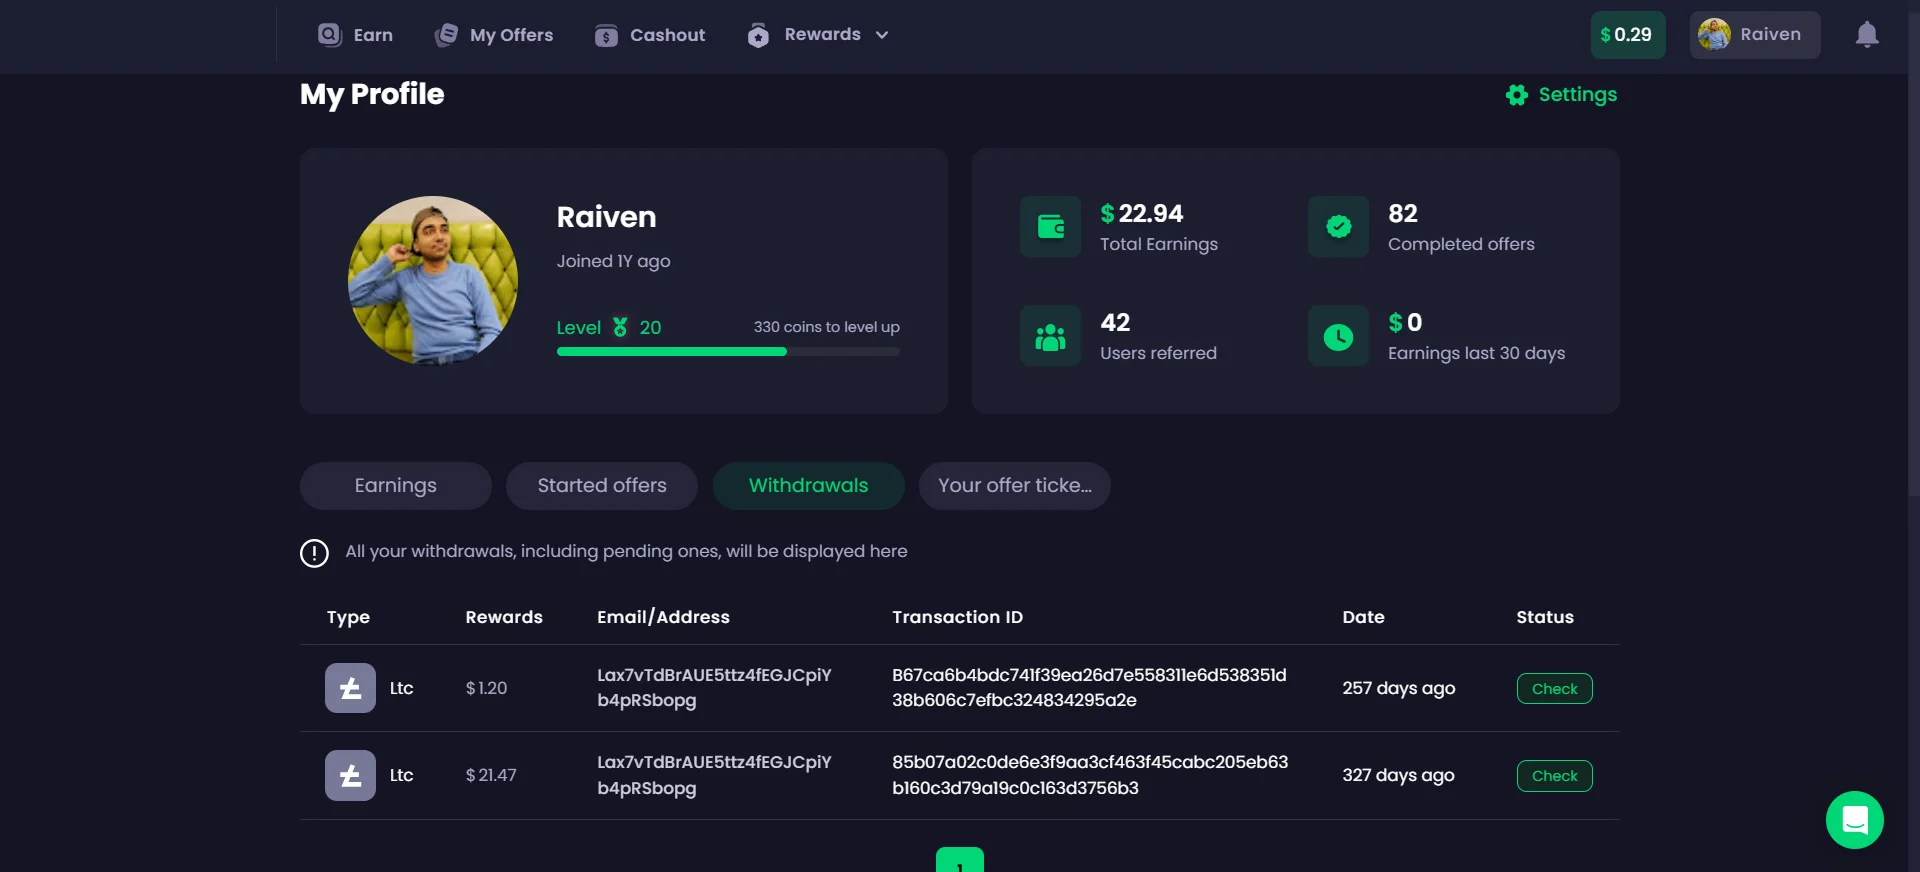
Payment Proofs
Snapshots of some of my payment proofs is provided below
Passive Earning
Passive earning is a type of earning known as "earn while you sleep" - you start the engine once and it keeps earning for you forever. Some passive earning is free while others are paid. Today I will give you an example of how you can earn passively for free. All you need is a PC (Windows or MAC) - one you have it and an internet connection you are good to go. Follow along:
1. Create an account to a passive earning site and verify your email
2. Go to the hub, scroll down and choose the device where you want to install the application - see image below:

3. Install and run the downloaded file to your device. In my case, I downloaded and installed on my Windows PC as shown:
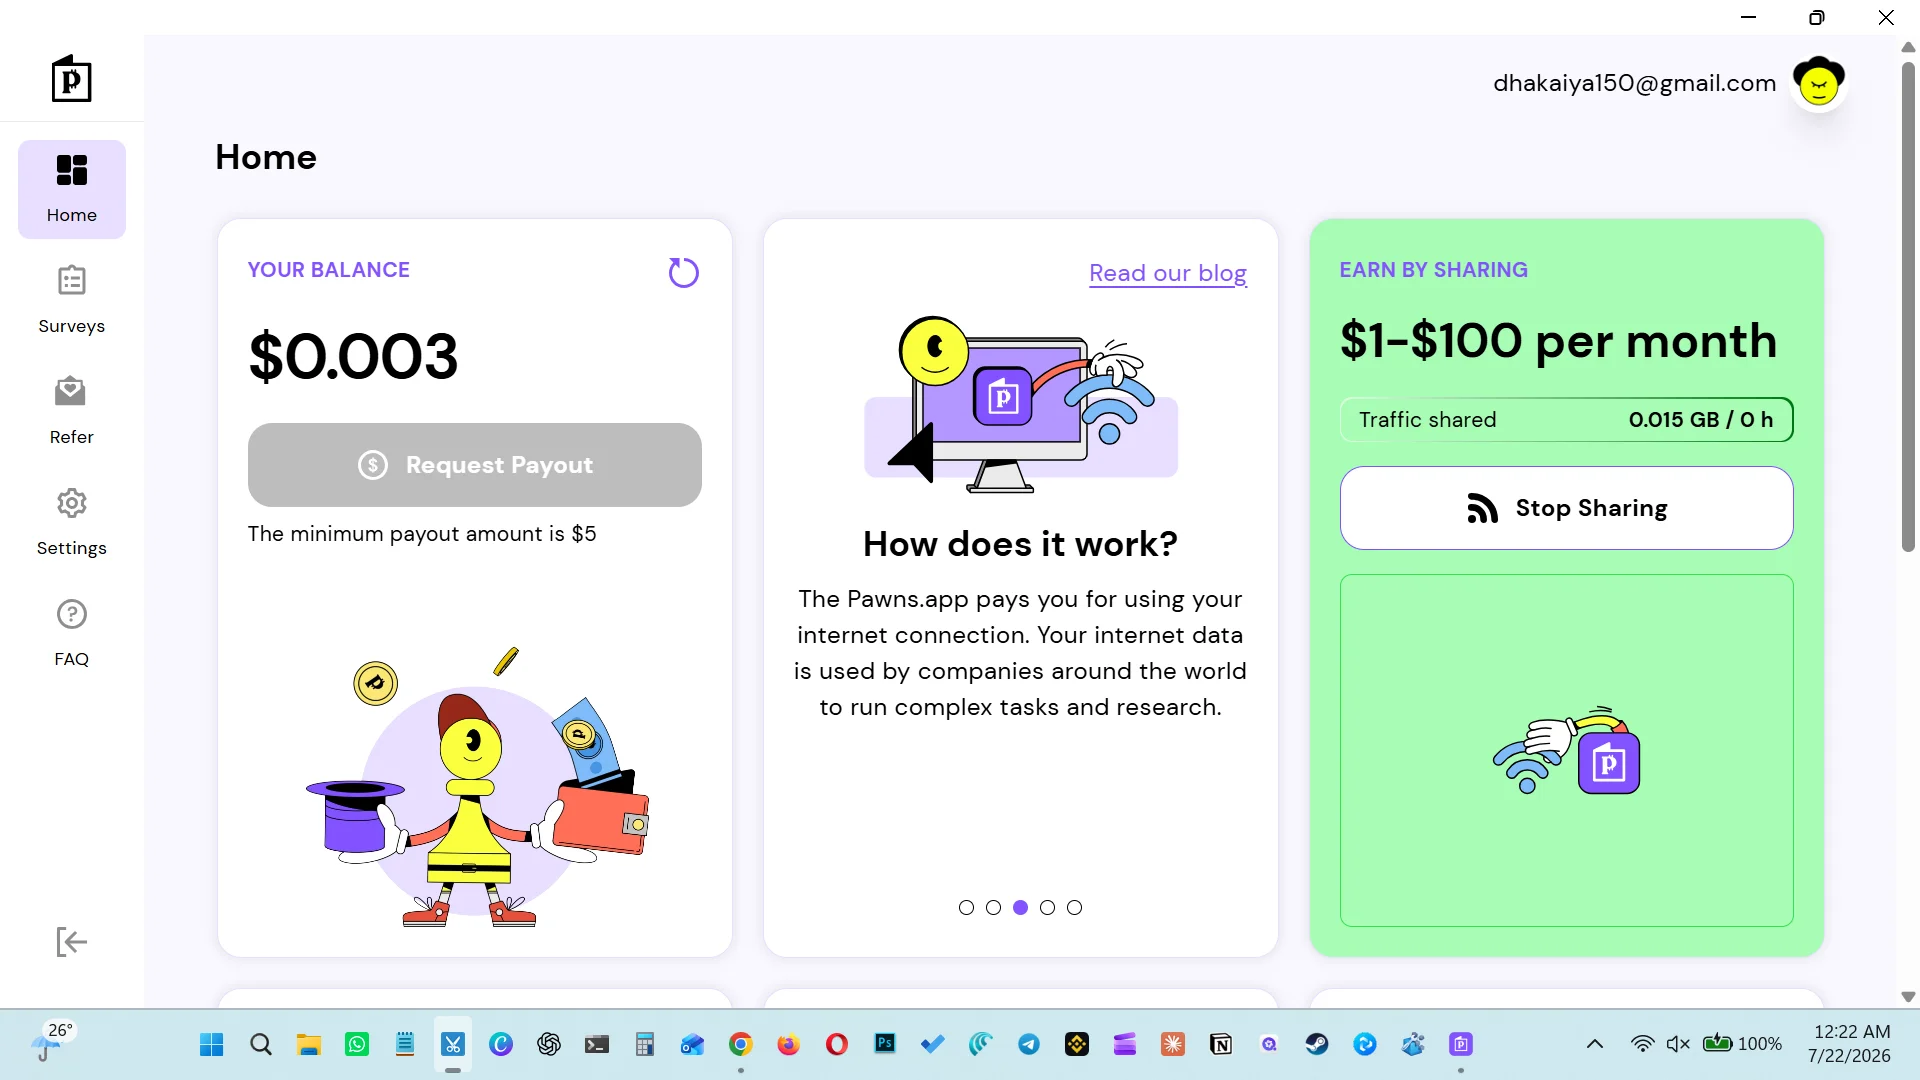
This software pays you for sharing only 5% of your internet speed - if you are using 100 Mbps speed, this software will take only 5 Mbps speed
Advanced modules
Level 2 freelancing
Advanced modules are coming soon. These include website creation and monetization, online store and digital product creation as well as dropshipping